This beginner’s guide will give you an overview of reupholstering a sofa in a quick and easy way, accompanied by photos and bitesize instructions. I used this exact method to reupholster my sofa after it was ruined by bad tenants while travelling around Asia.
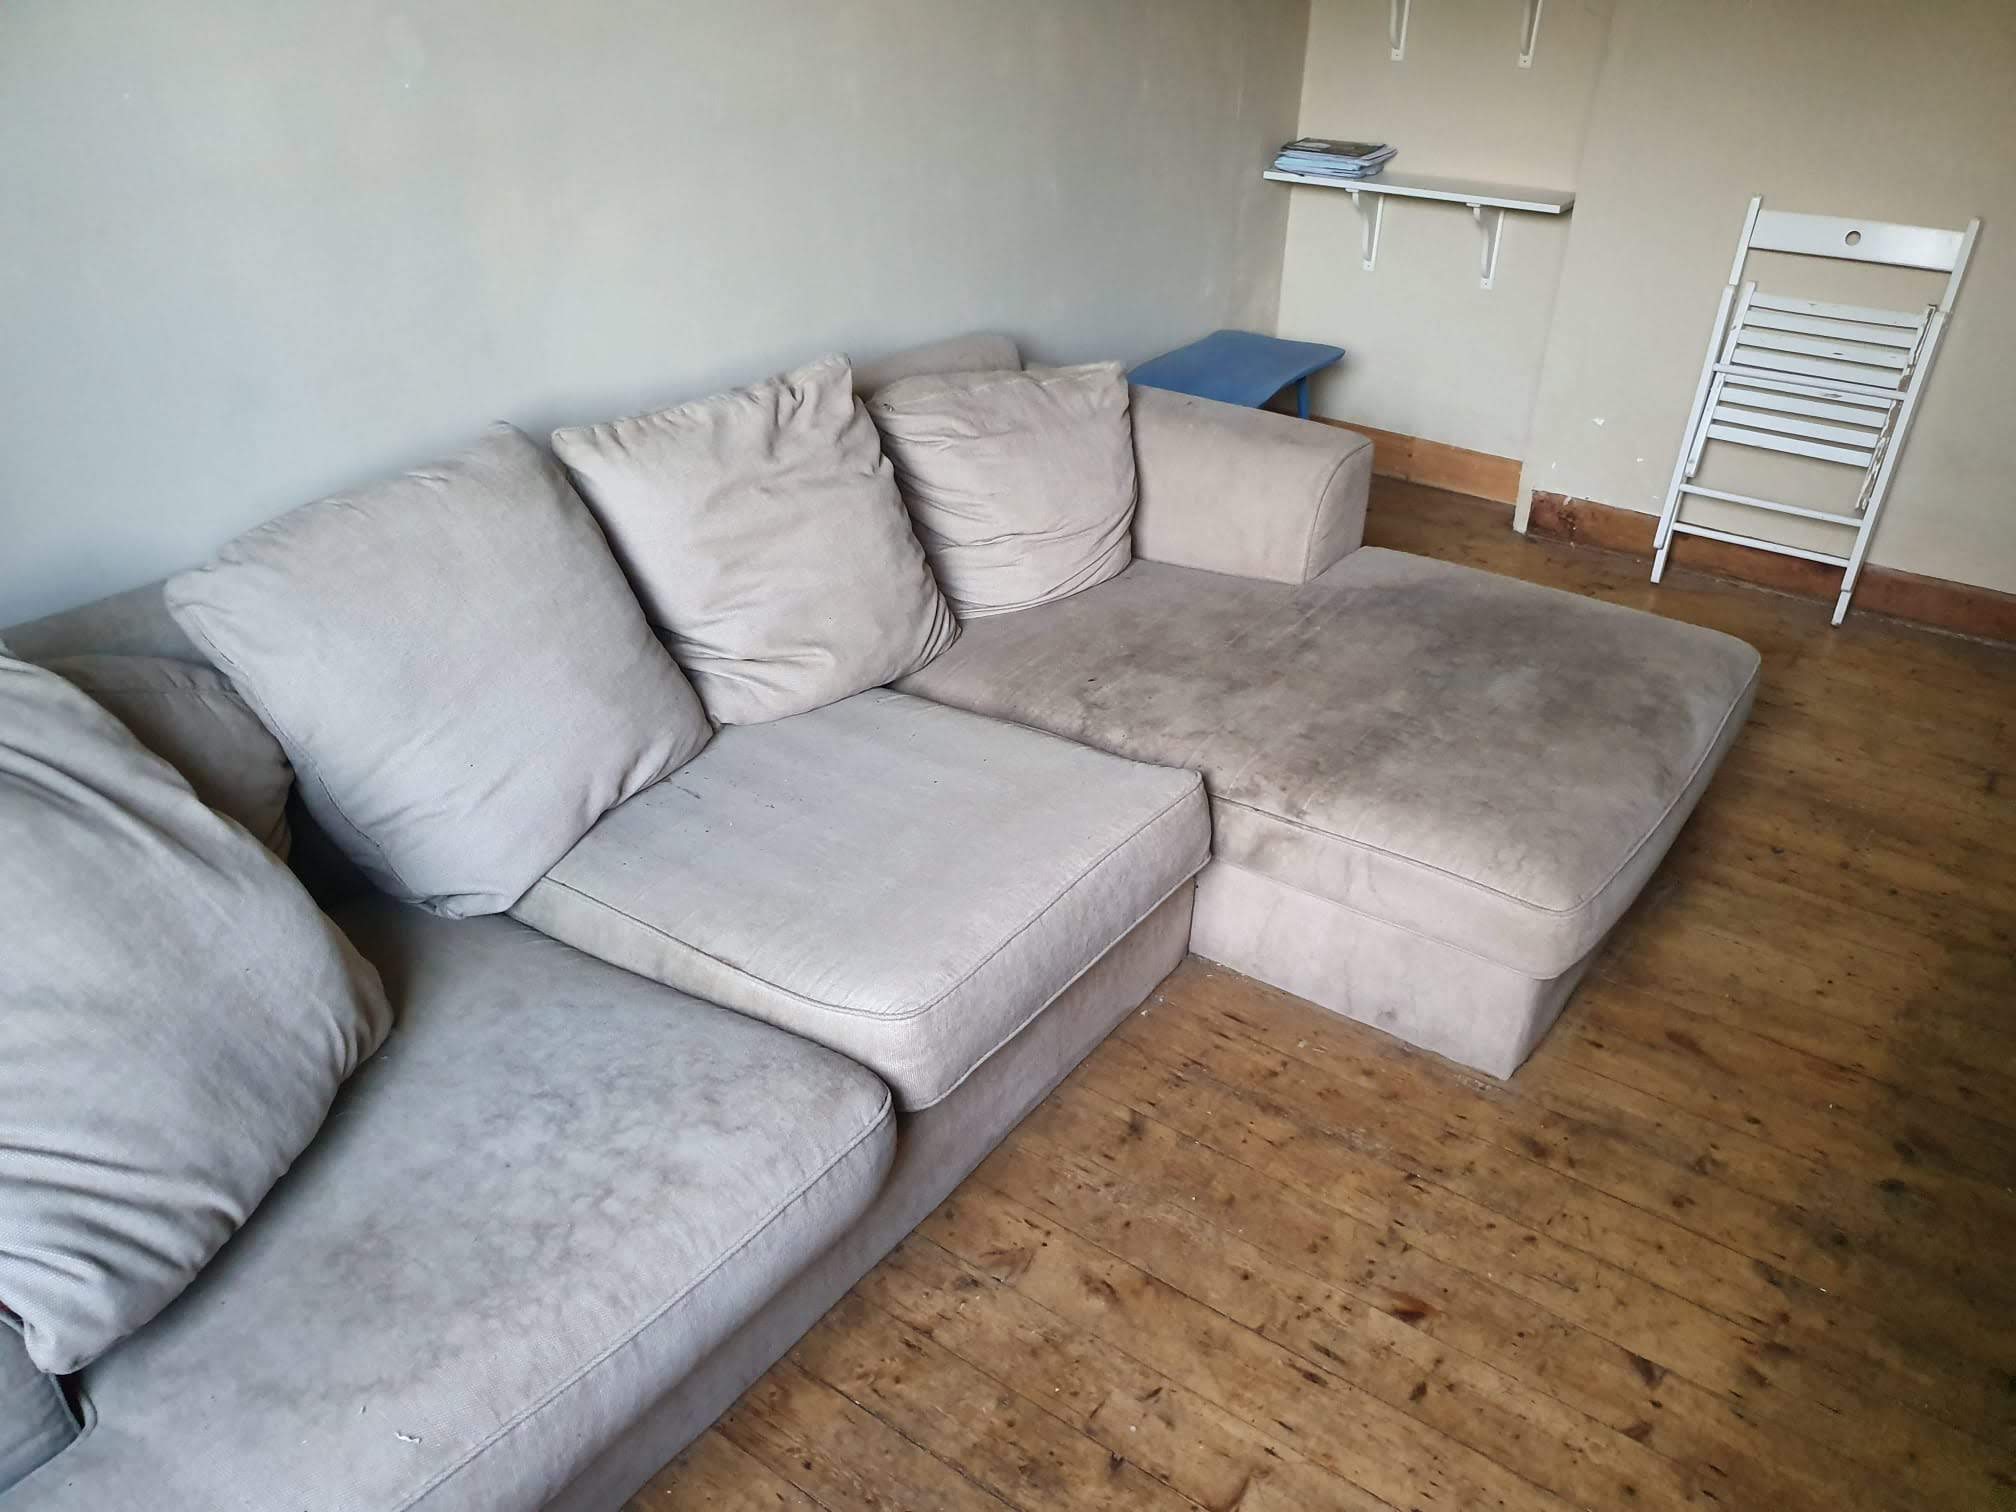
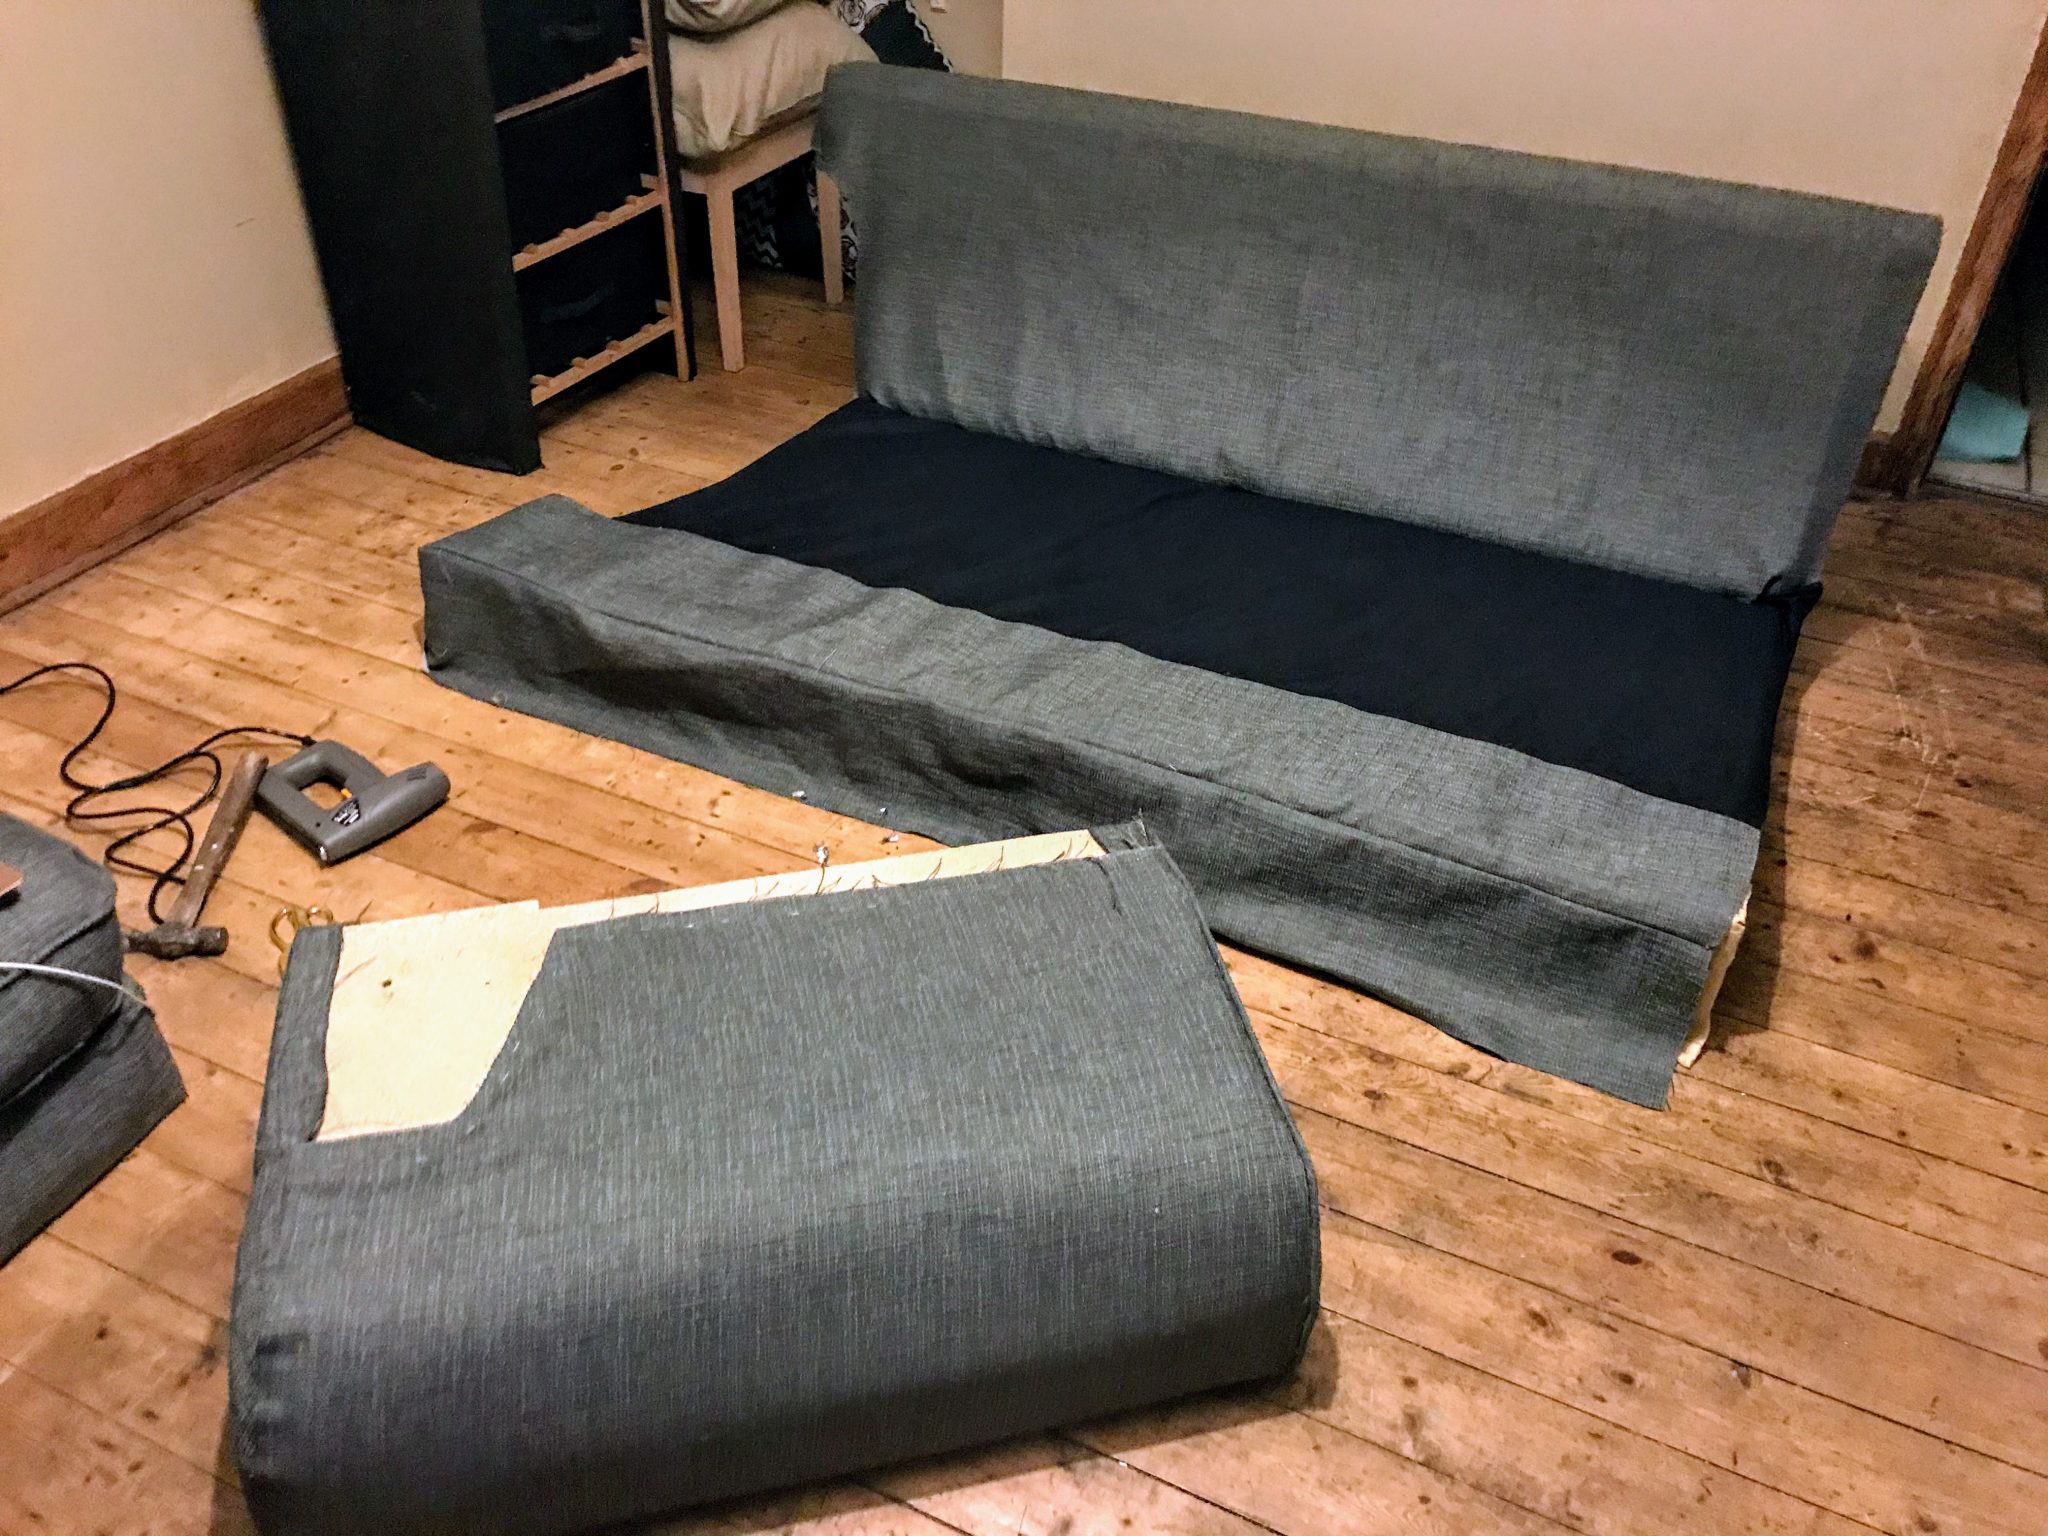
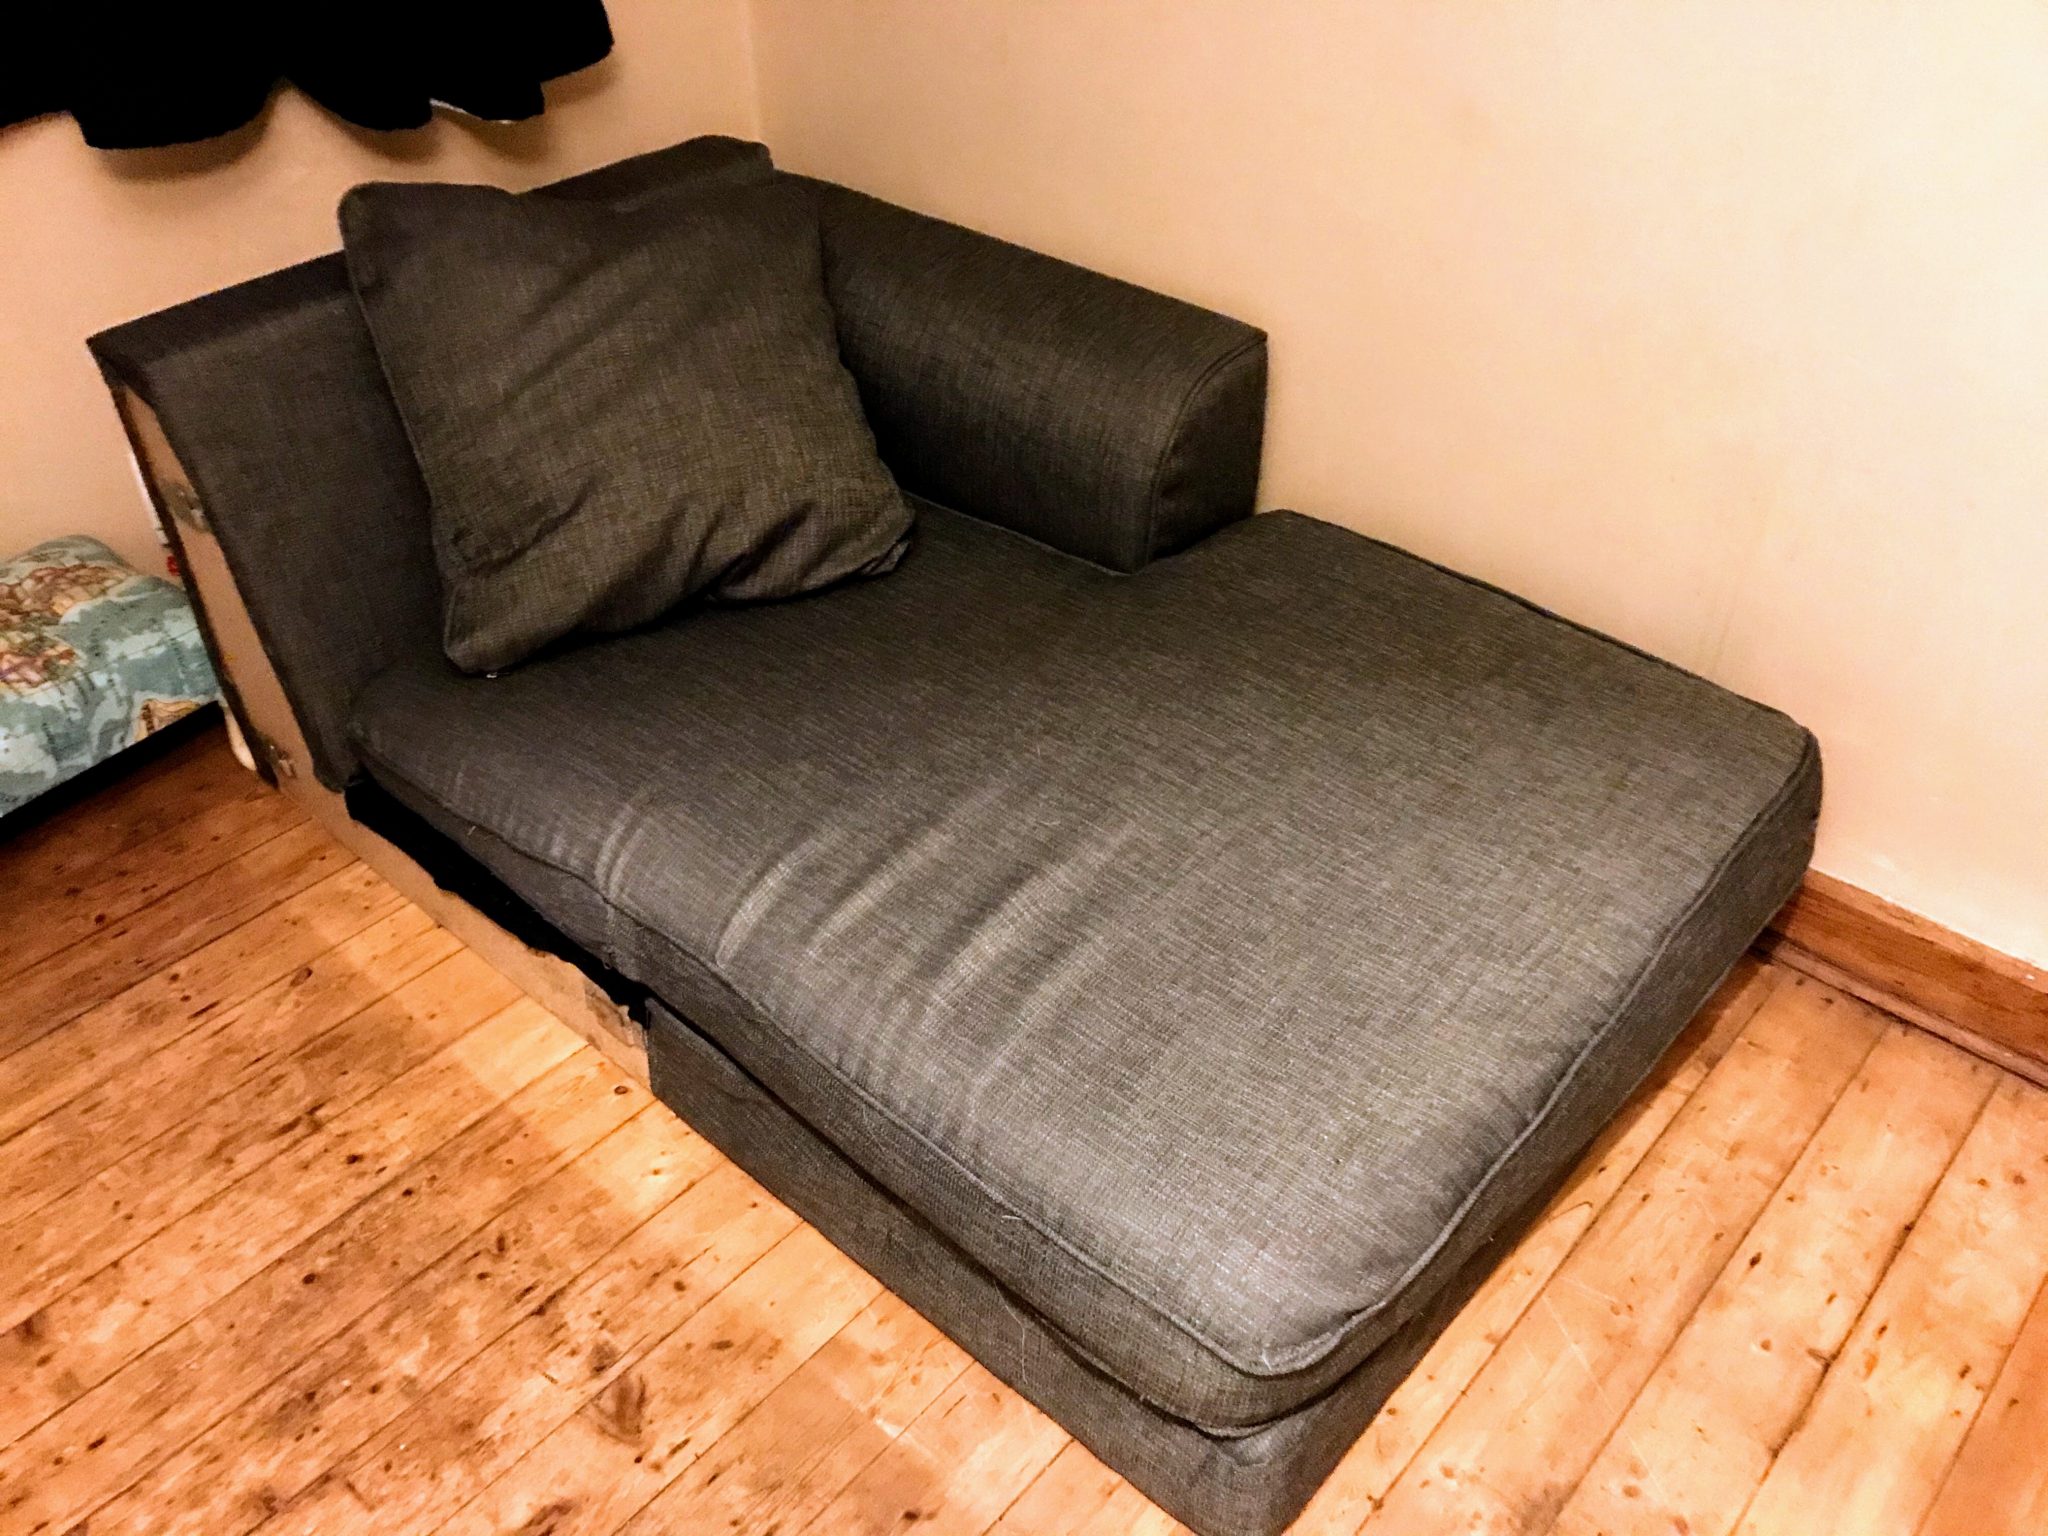
I am going to show you in quick and easy stages, how to go from this:
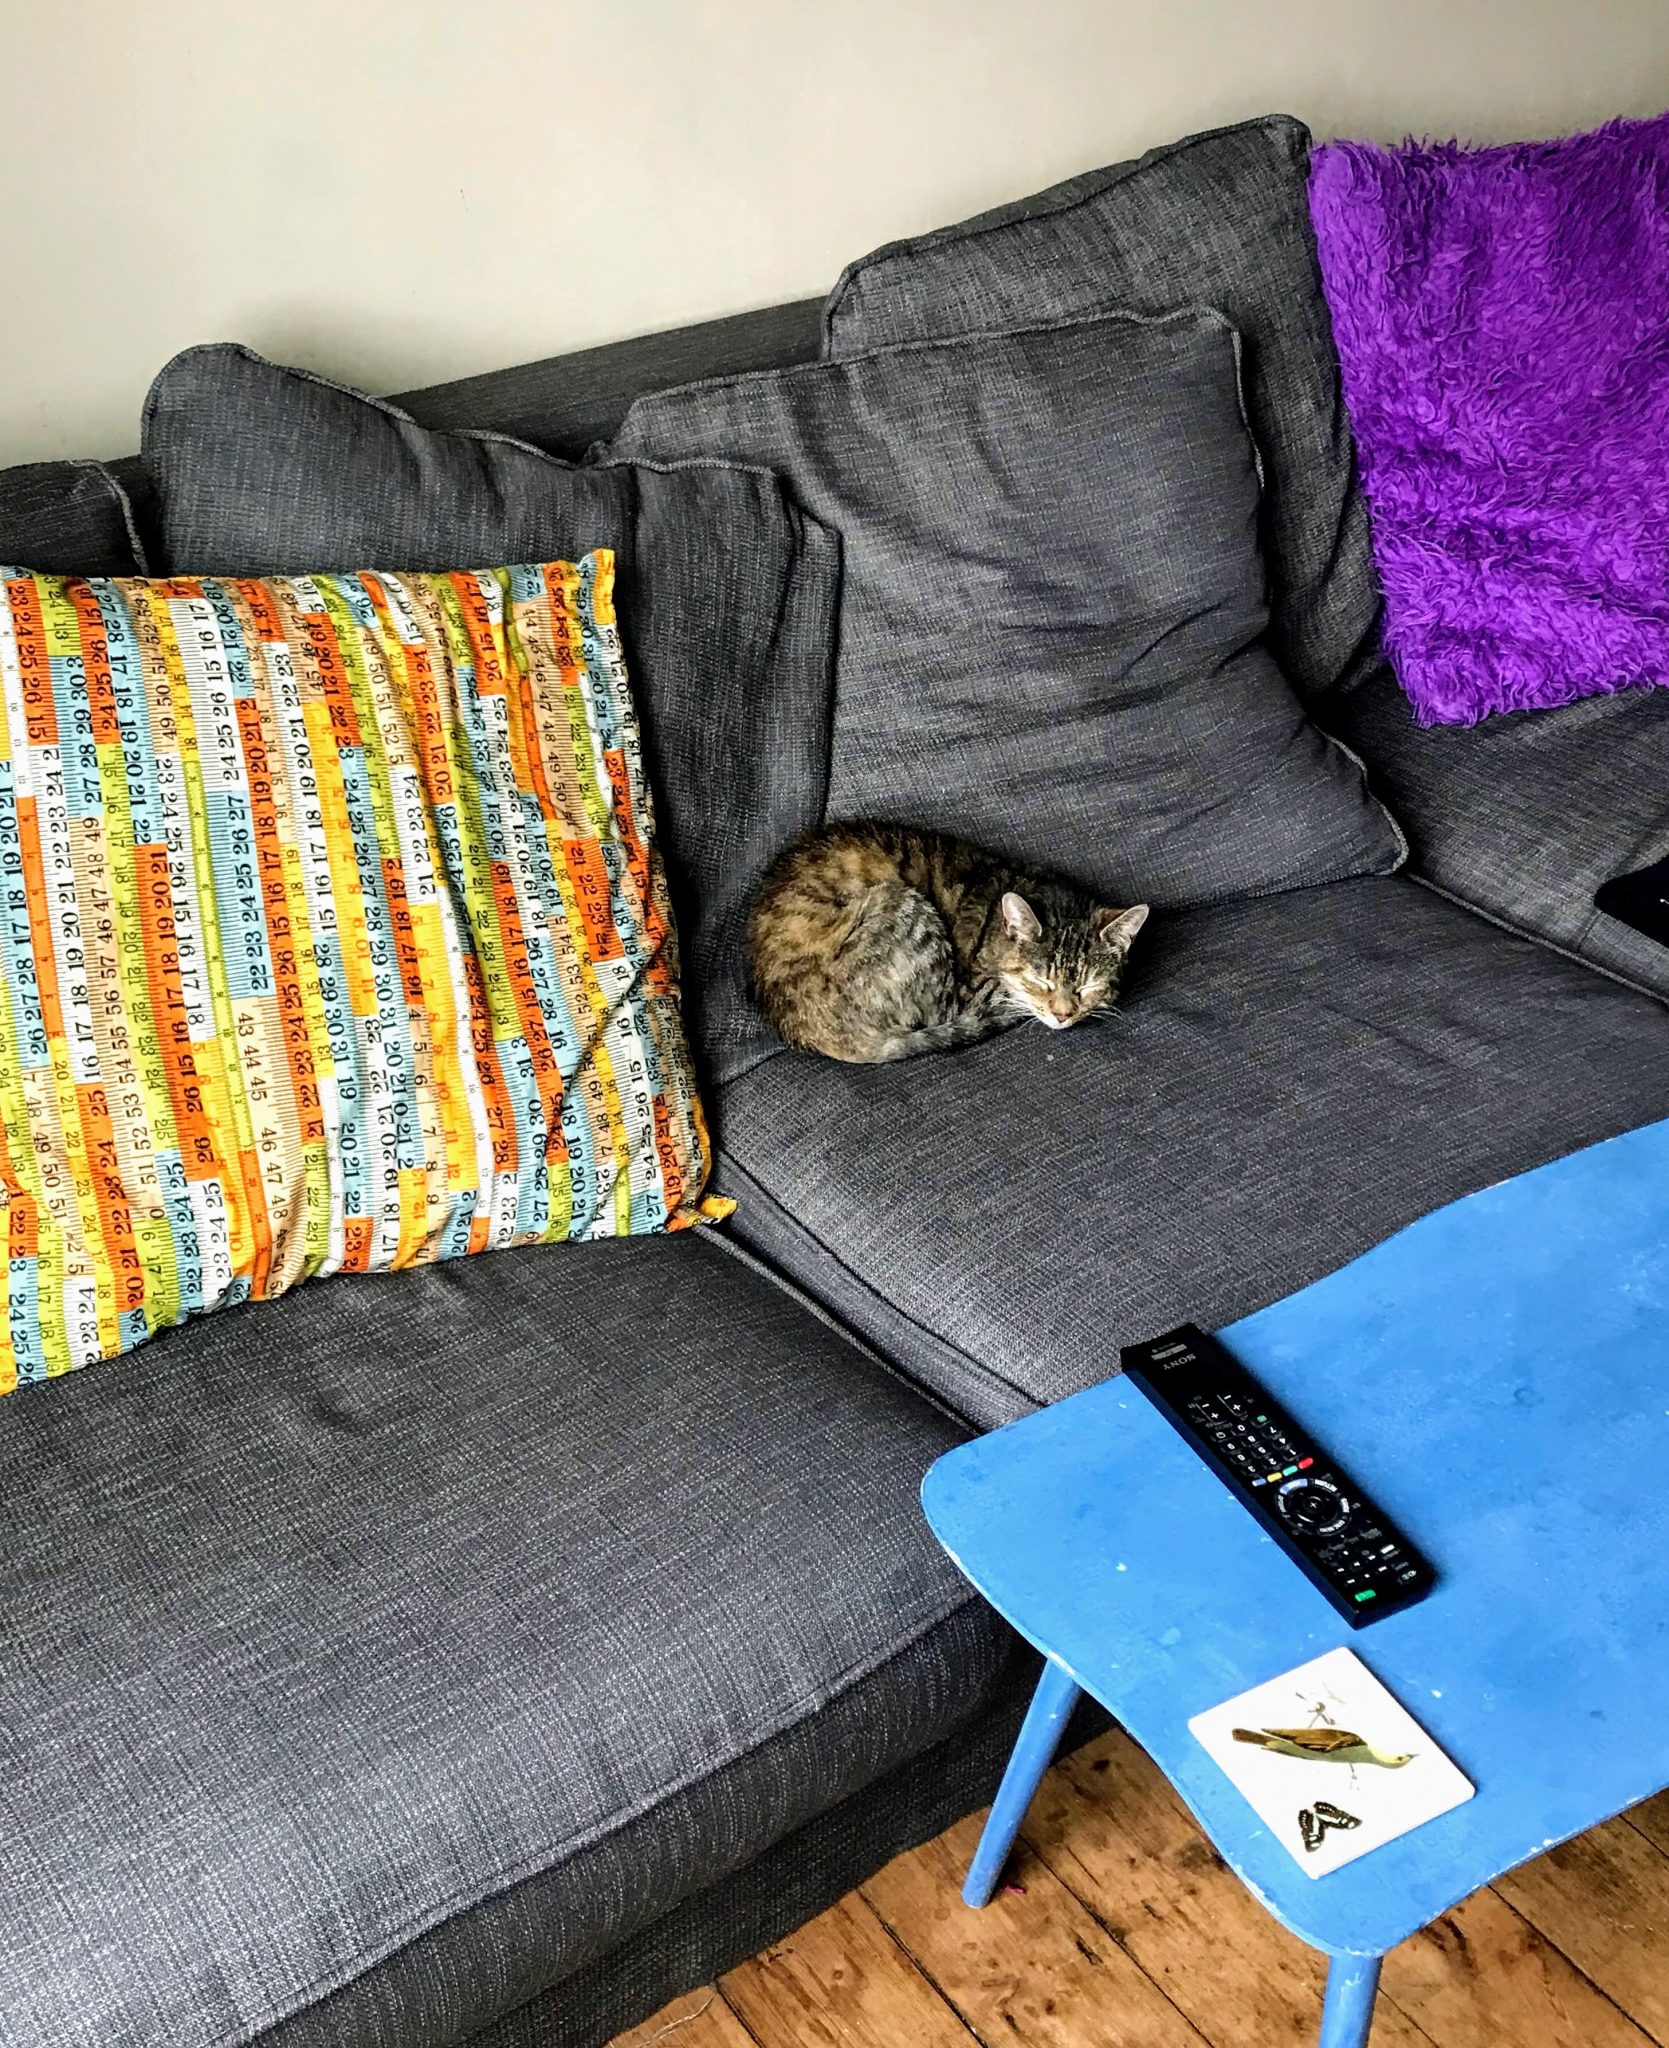
To this:

When choosing your upholstery fabric, make sure that you have enough to cover your entire sofa or that you can get more if you run out. I recommend using upholstery fabric specifically as it is hardwearing and it keeps its shape. Some is fire retardant so it burns less easily. Be wary of patterns as you’ll need to match them up, plain fabric can be best for a beginner.
This post may contain affiliate links.
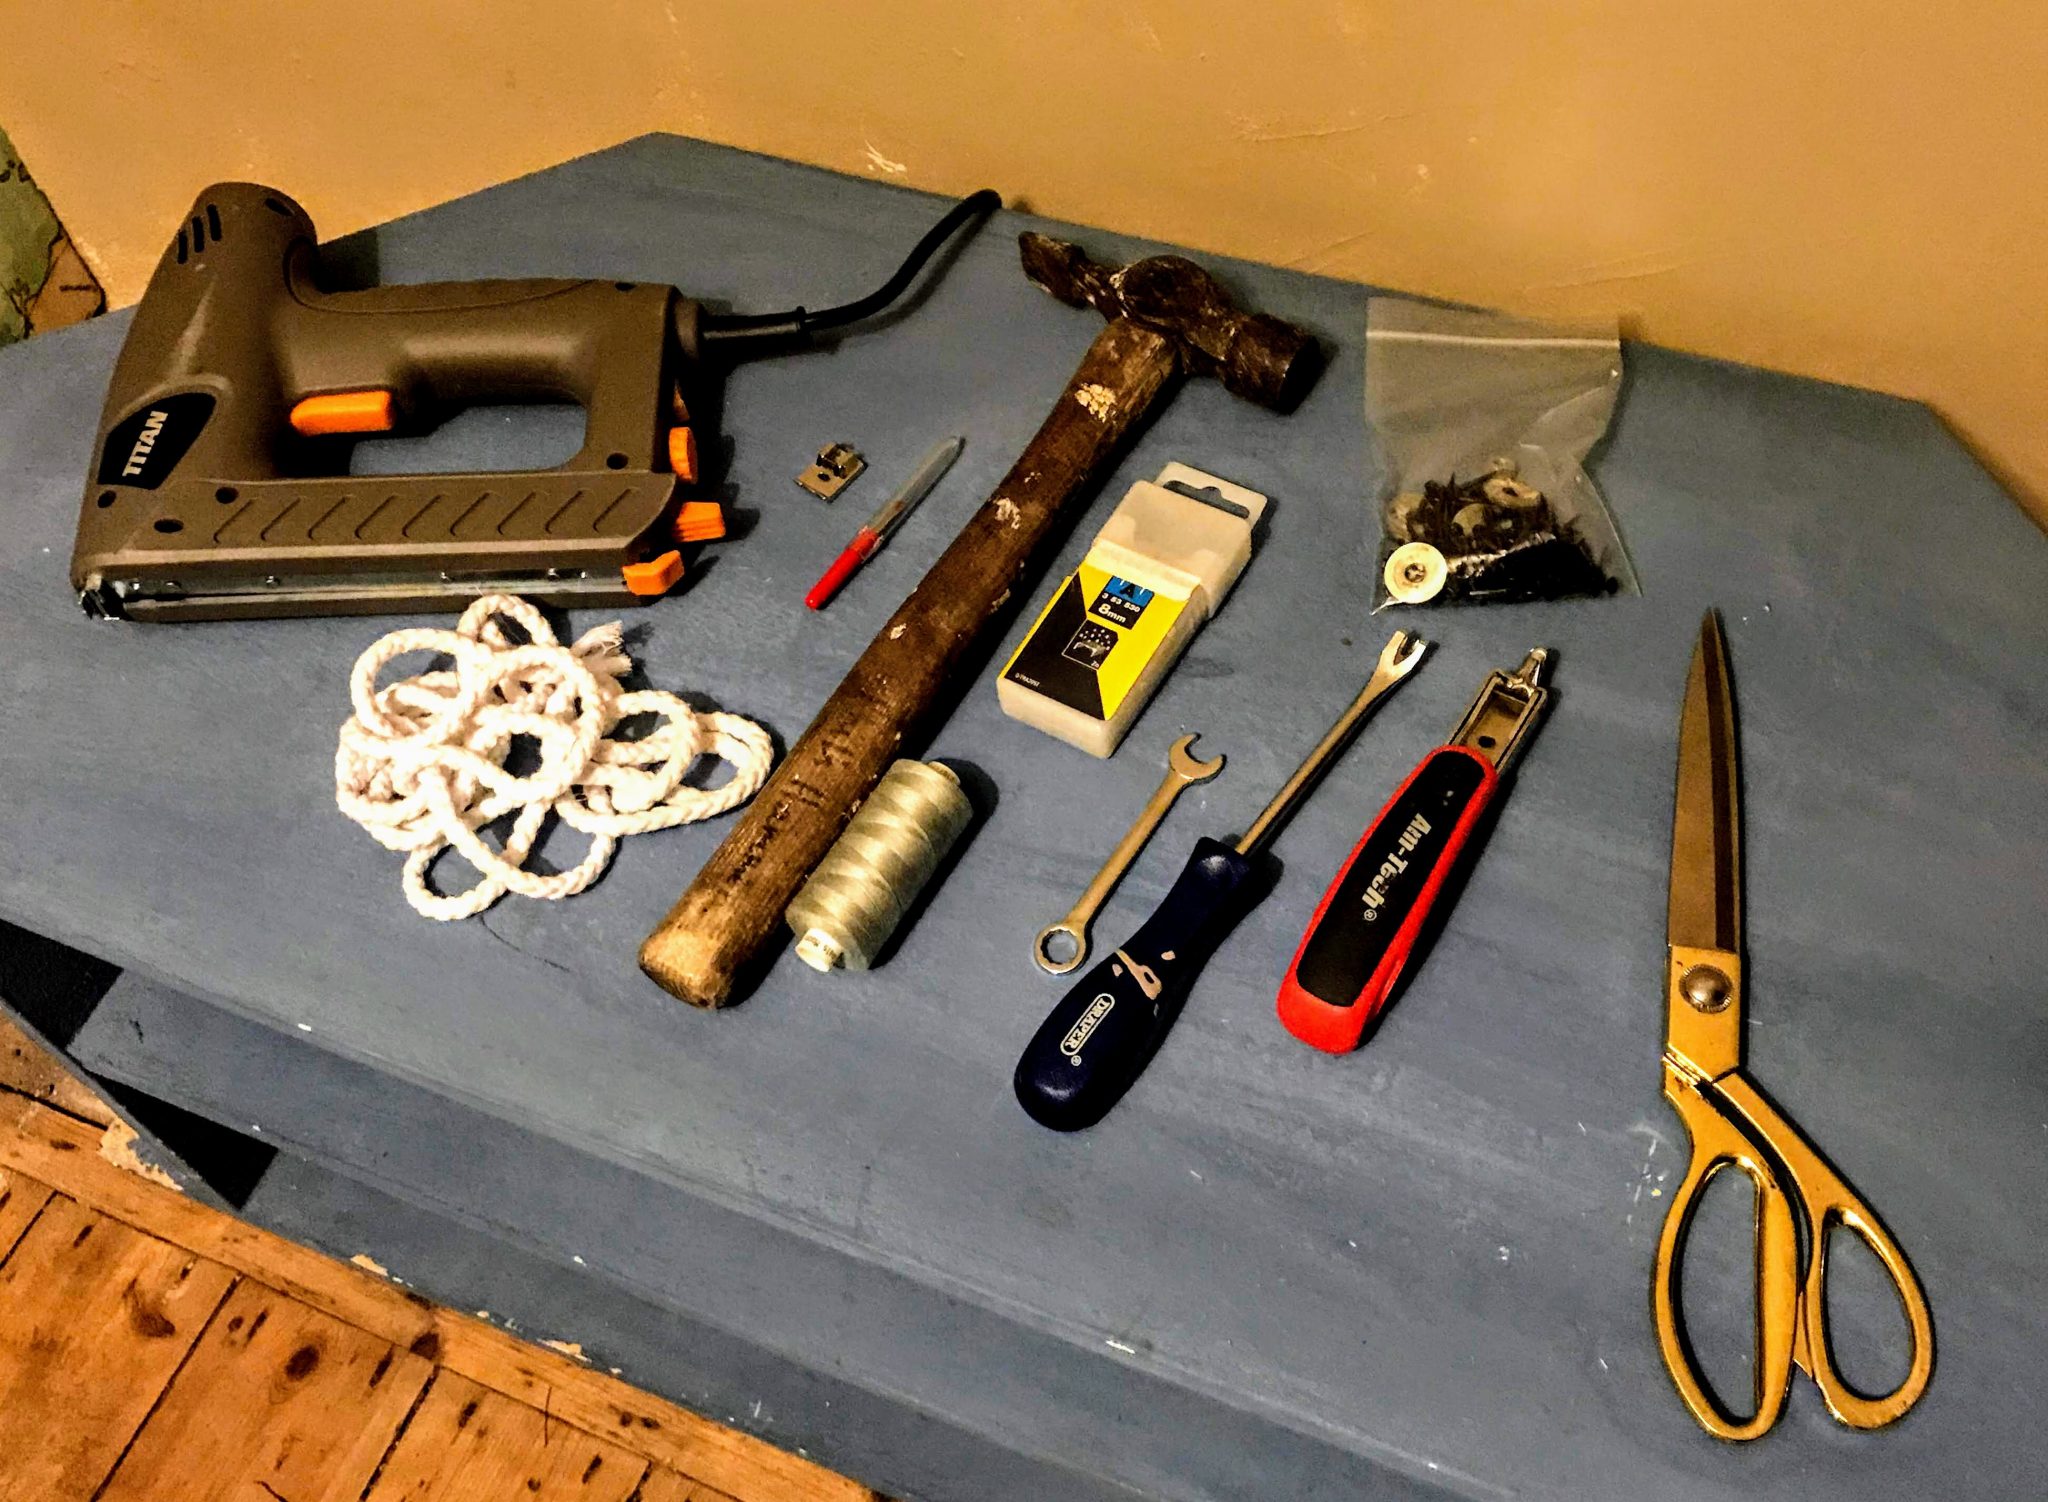
As well as your fabric, and a sofa, these are the things that you’ll need to upholster a sofa.
You will need:
- An electric staple gun and staples
- A sewing machine
- Upholstery fabric
- Plain black fabric
- Matching thread
- Fabric scissors
- Tacks
- Hammer
- Staple remover
- Piping foot
- Piping cord
- Zips
- Unpicker
If you don’t have a sewing machine then you could rent or borrow one for the cushions. I recommend using an electric staple gun as it will make your life a lot easier. You will use a LOT of staples so make sure you have enough and that they’re the right size. A hammer can help you to get your tacks in if you’re struggling.
These are the 20 steps to transform your average sofa into the furniture of your dreams:
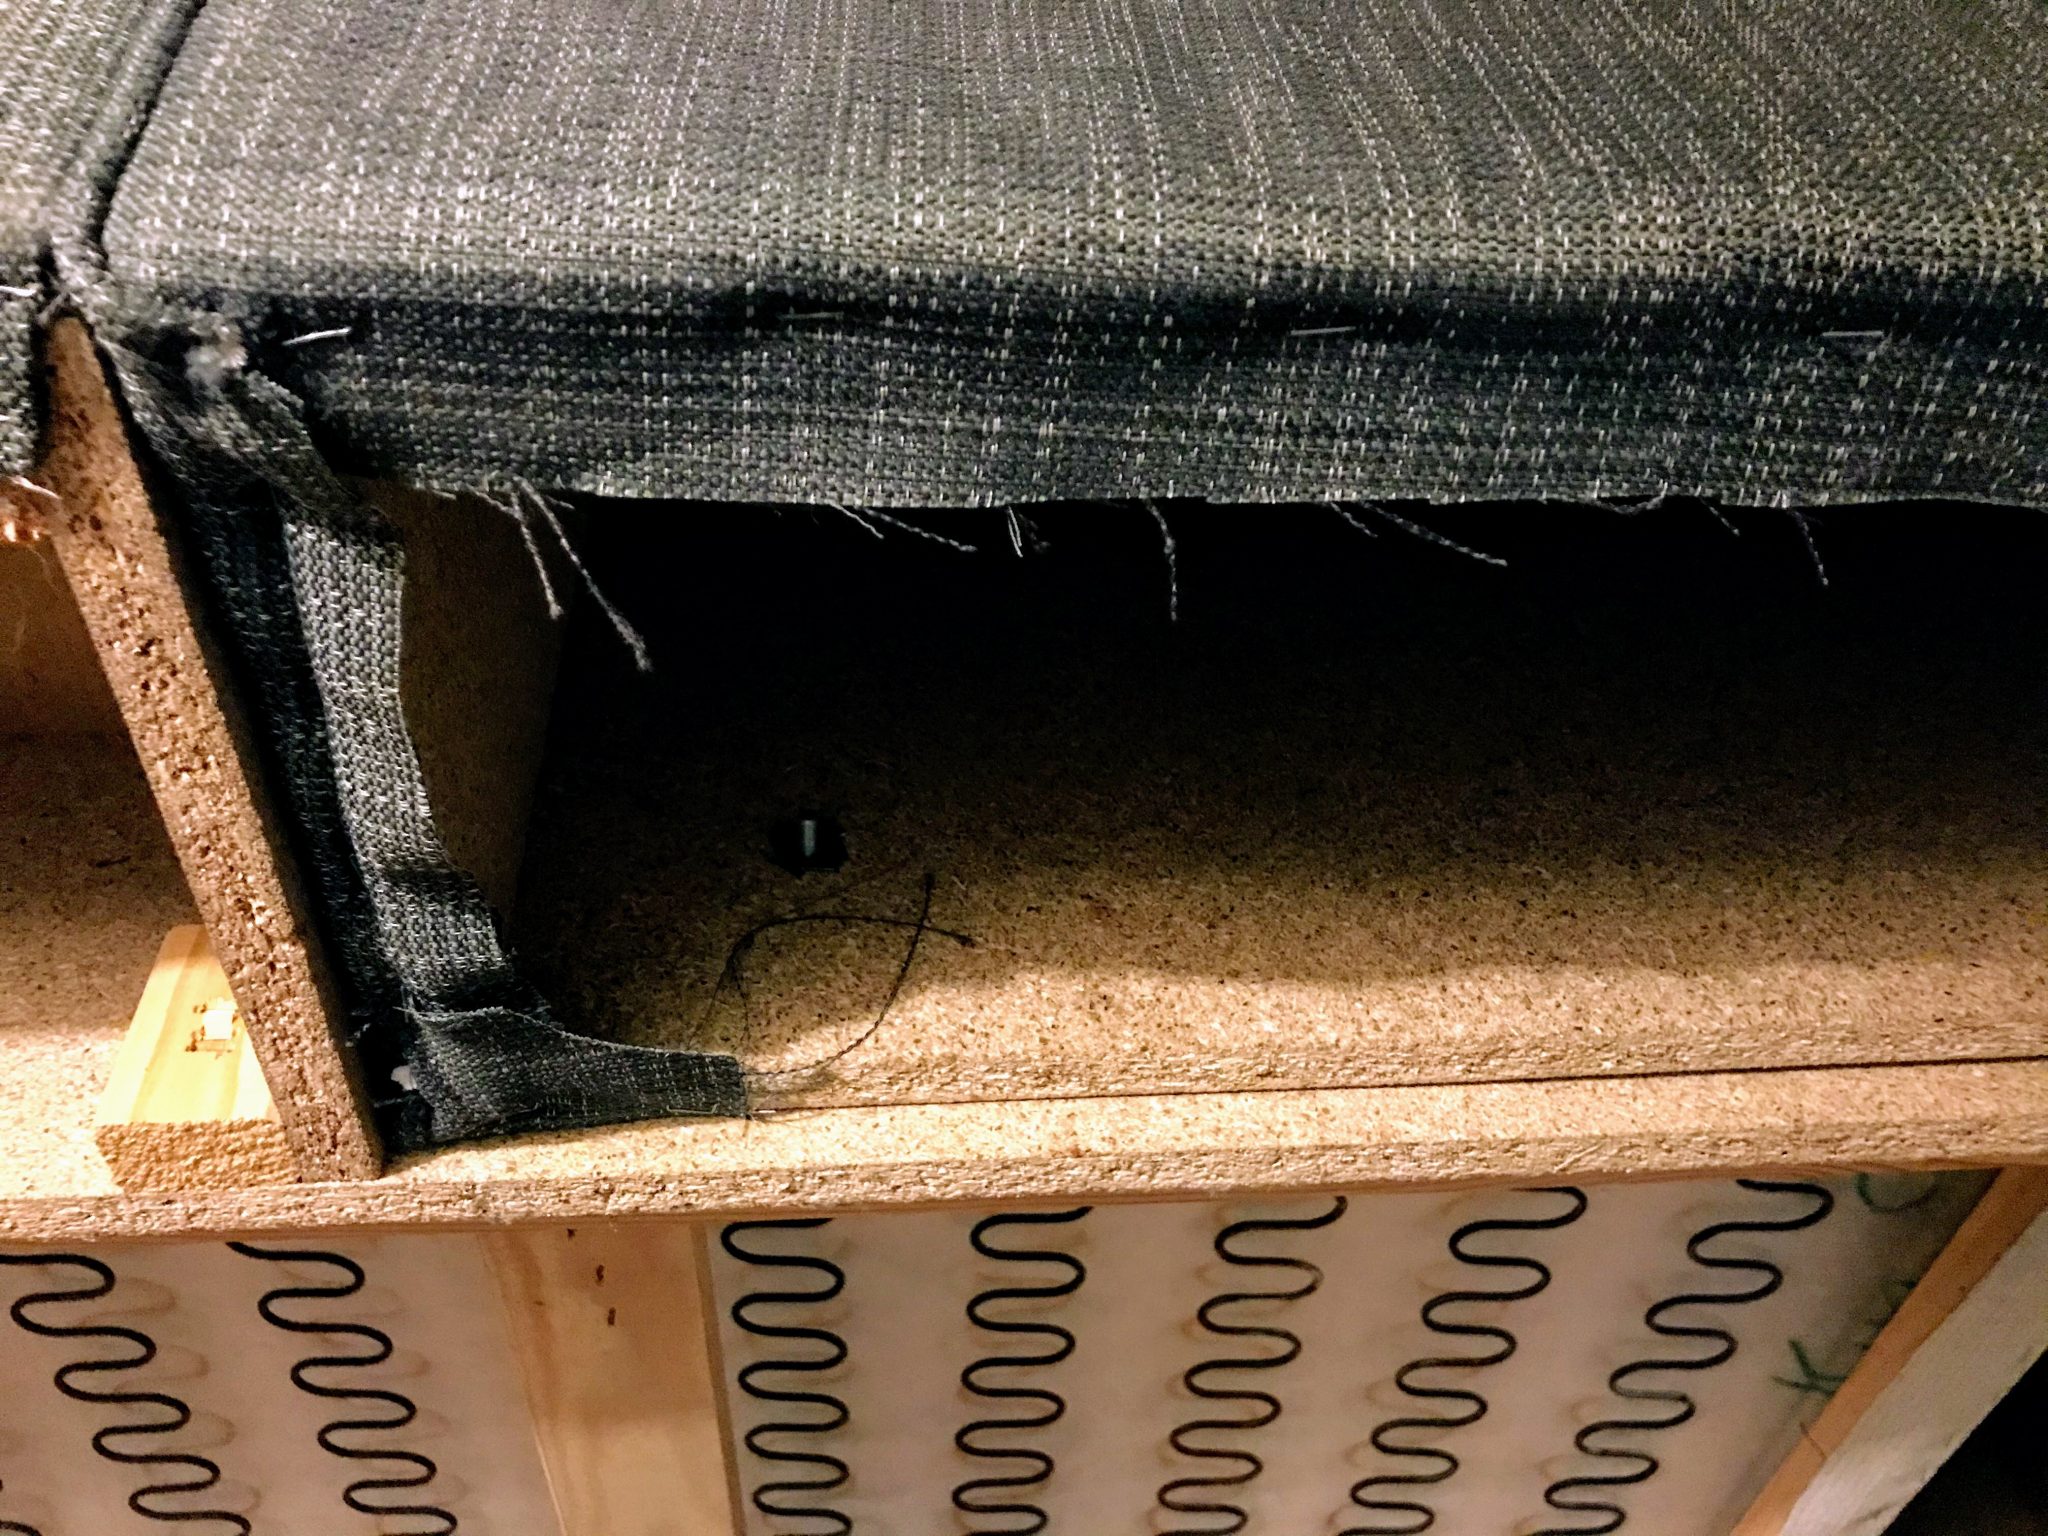
1. Separate your sofa if it’s big and turn it upside down. Remove all the staples from the bottom cover and remove it. You can replace this with new black fabric afterwards.

KEEP ALL PIECES INTACT AS YOU WILL NEED THESE LATER.
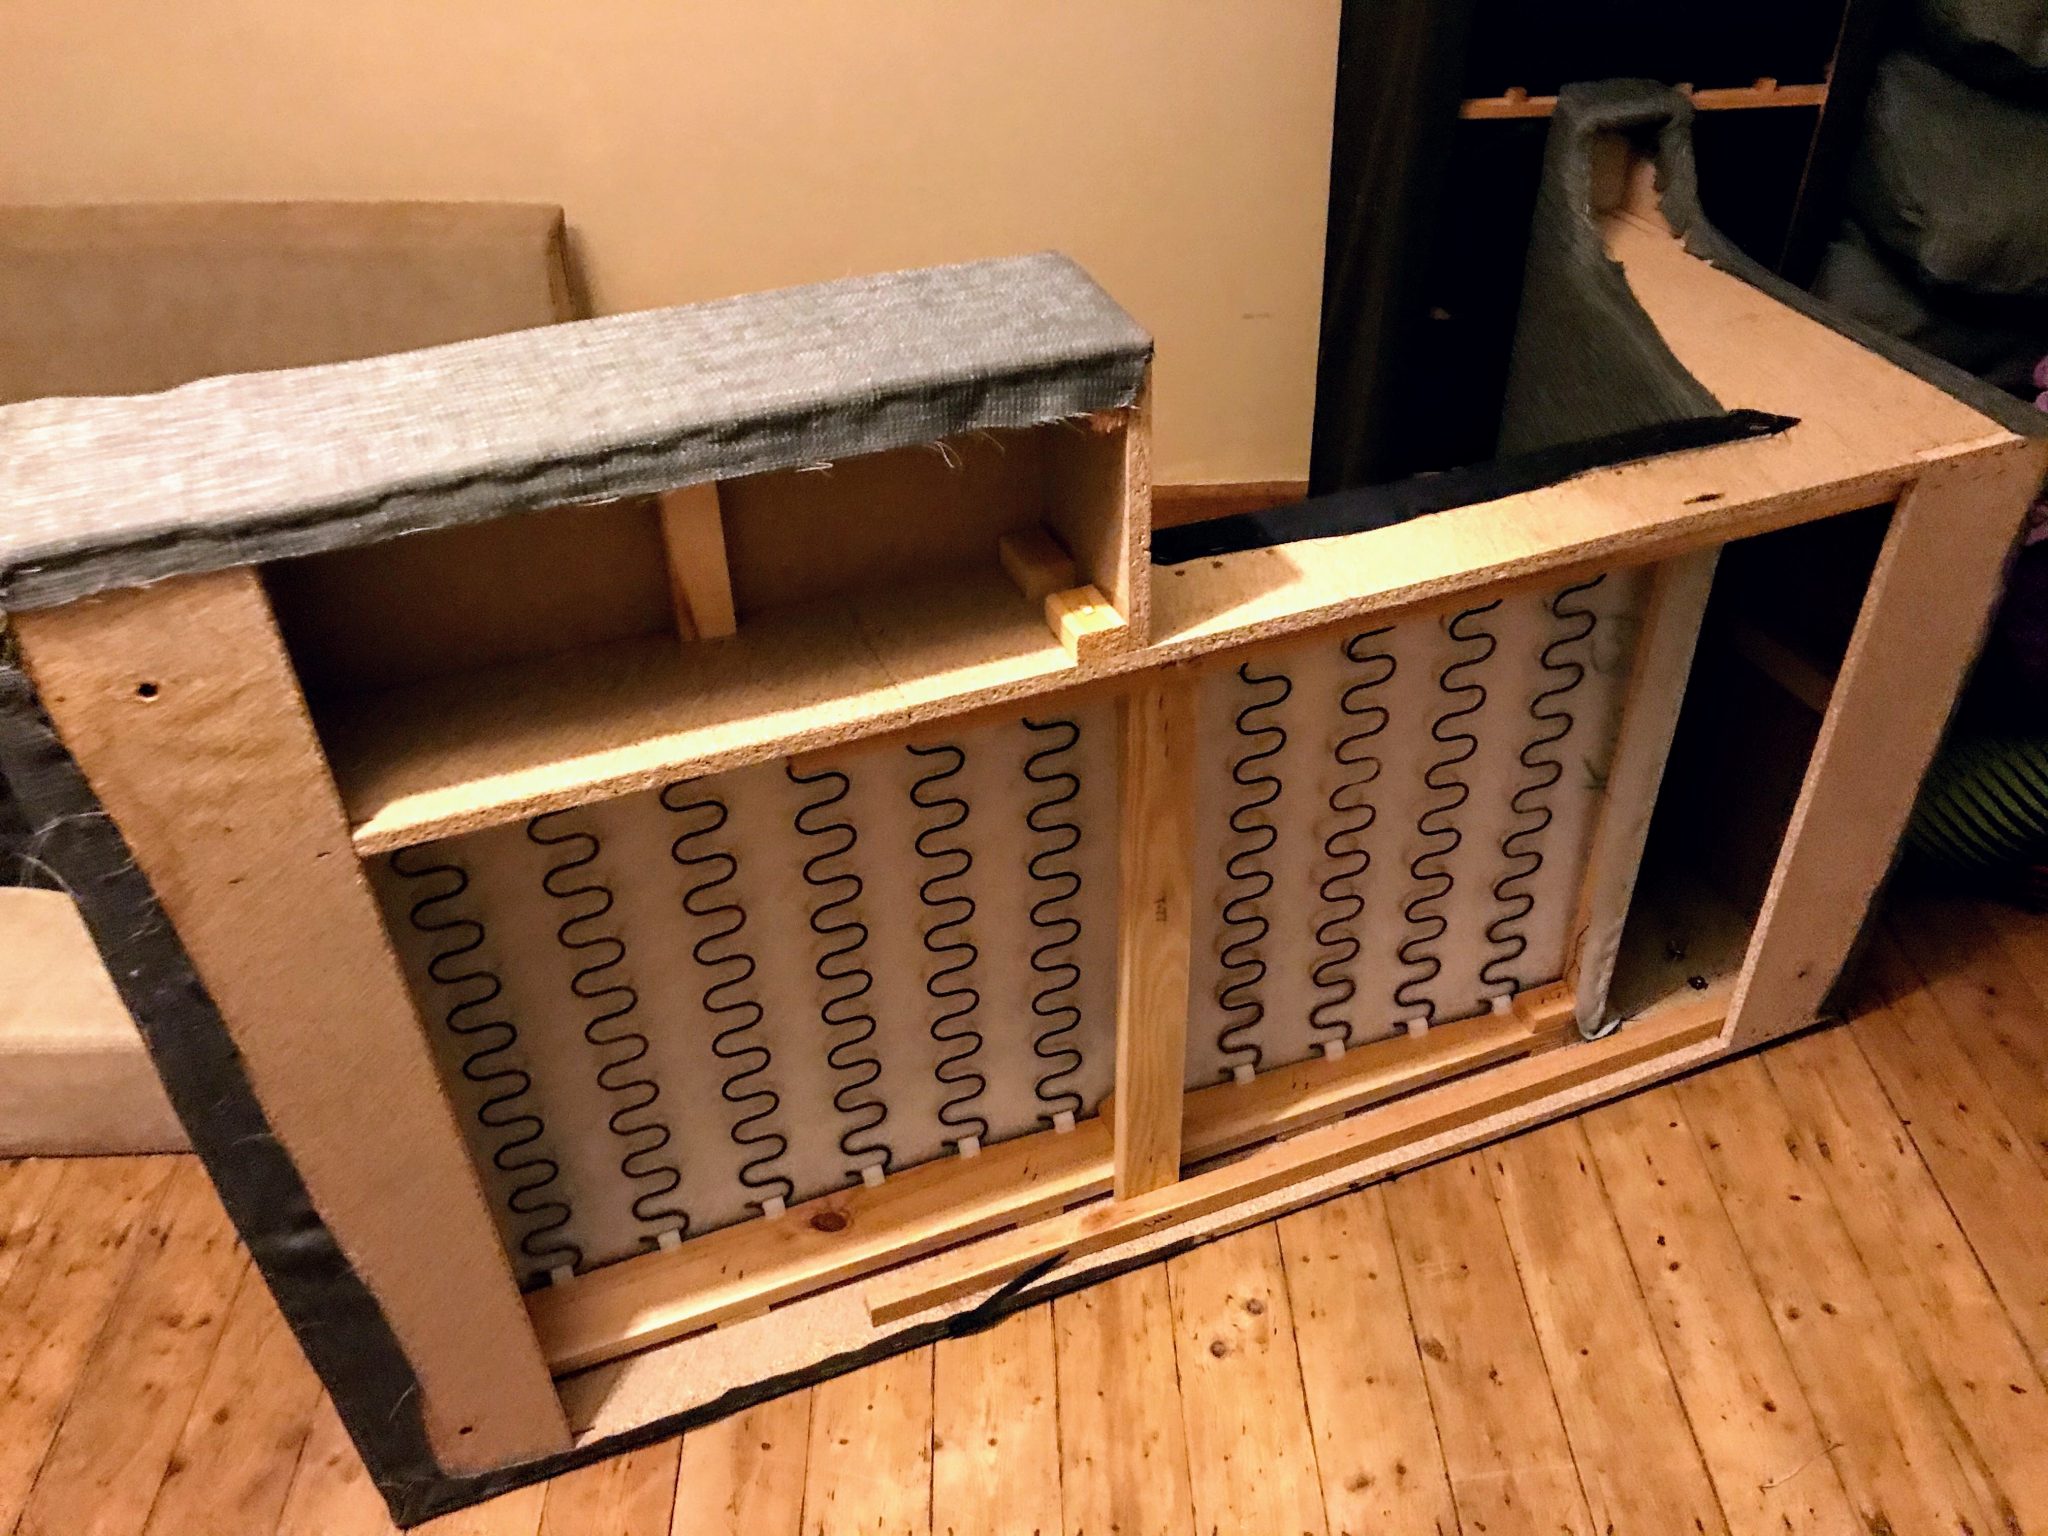
2. Look inside your sofa and take a picture so that you can see where everything goes. Now you can take it apart. Use a spanner to loosen bolts and take the arms off.
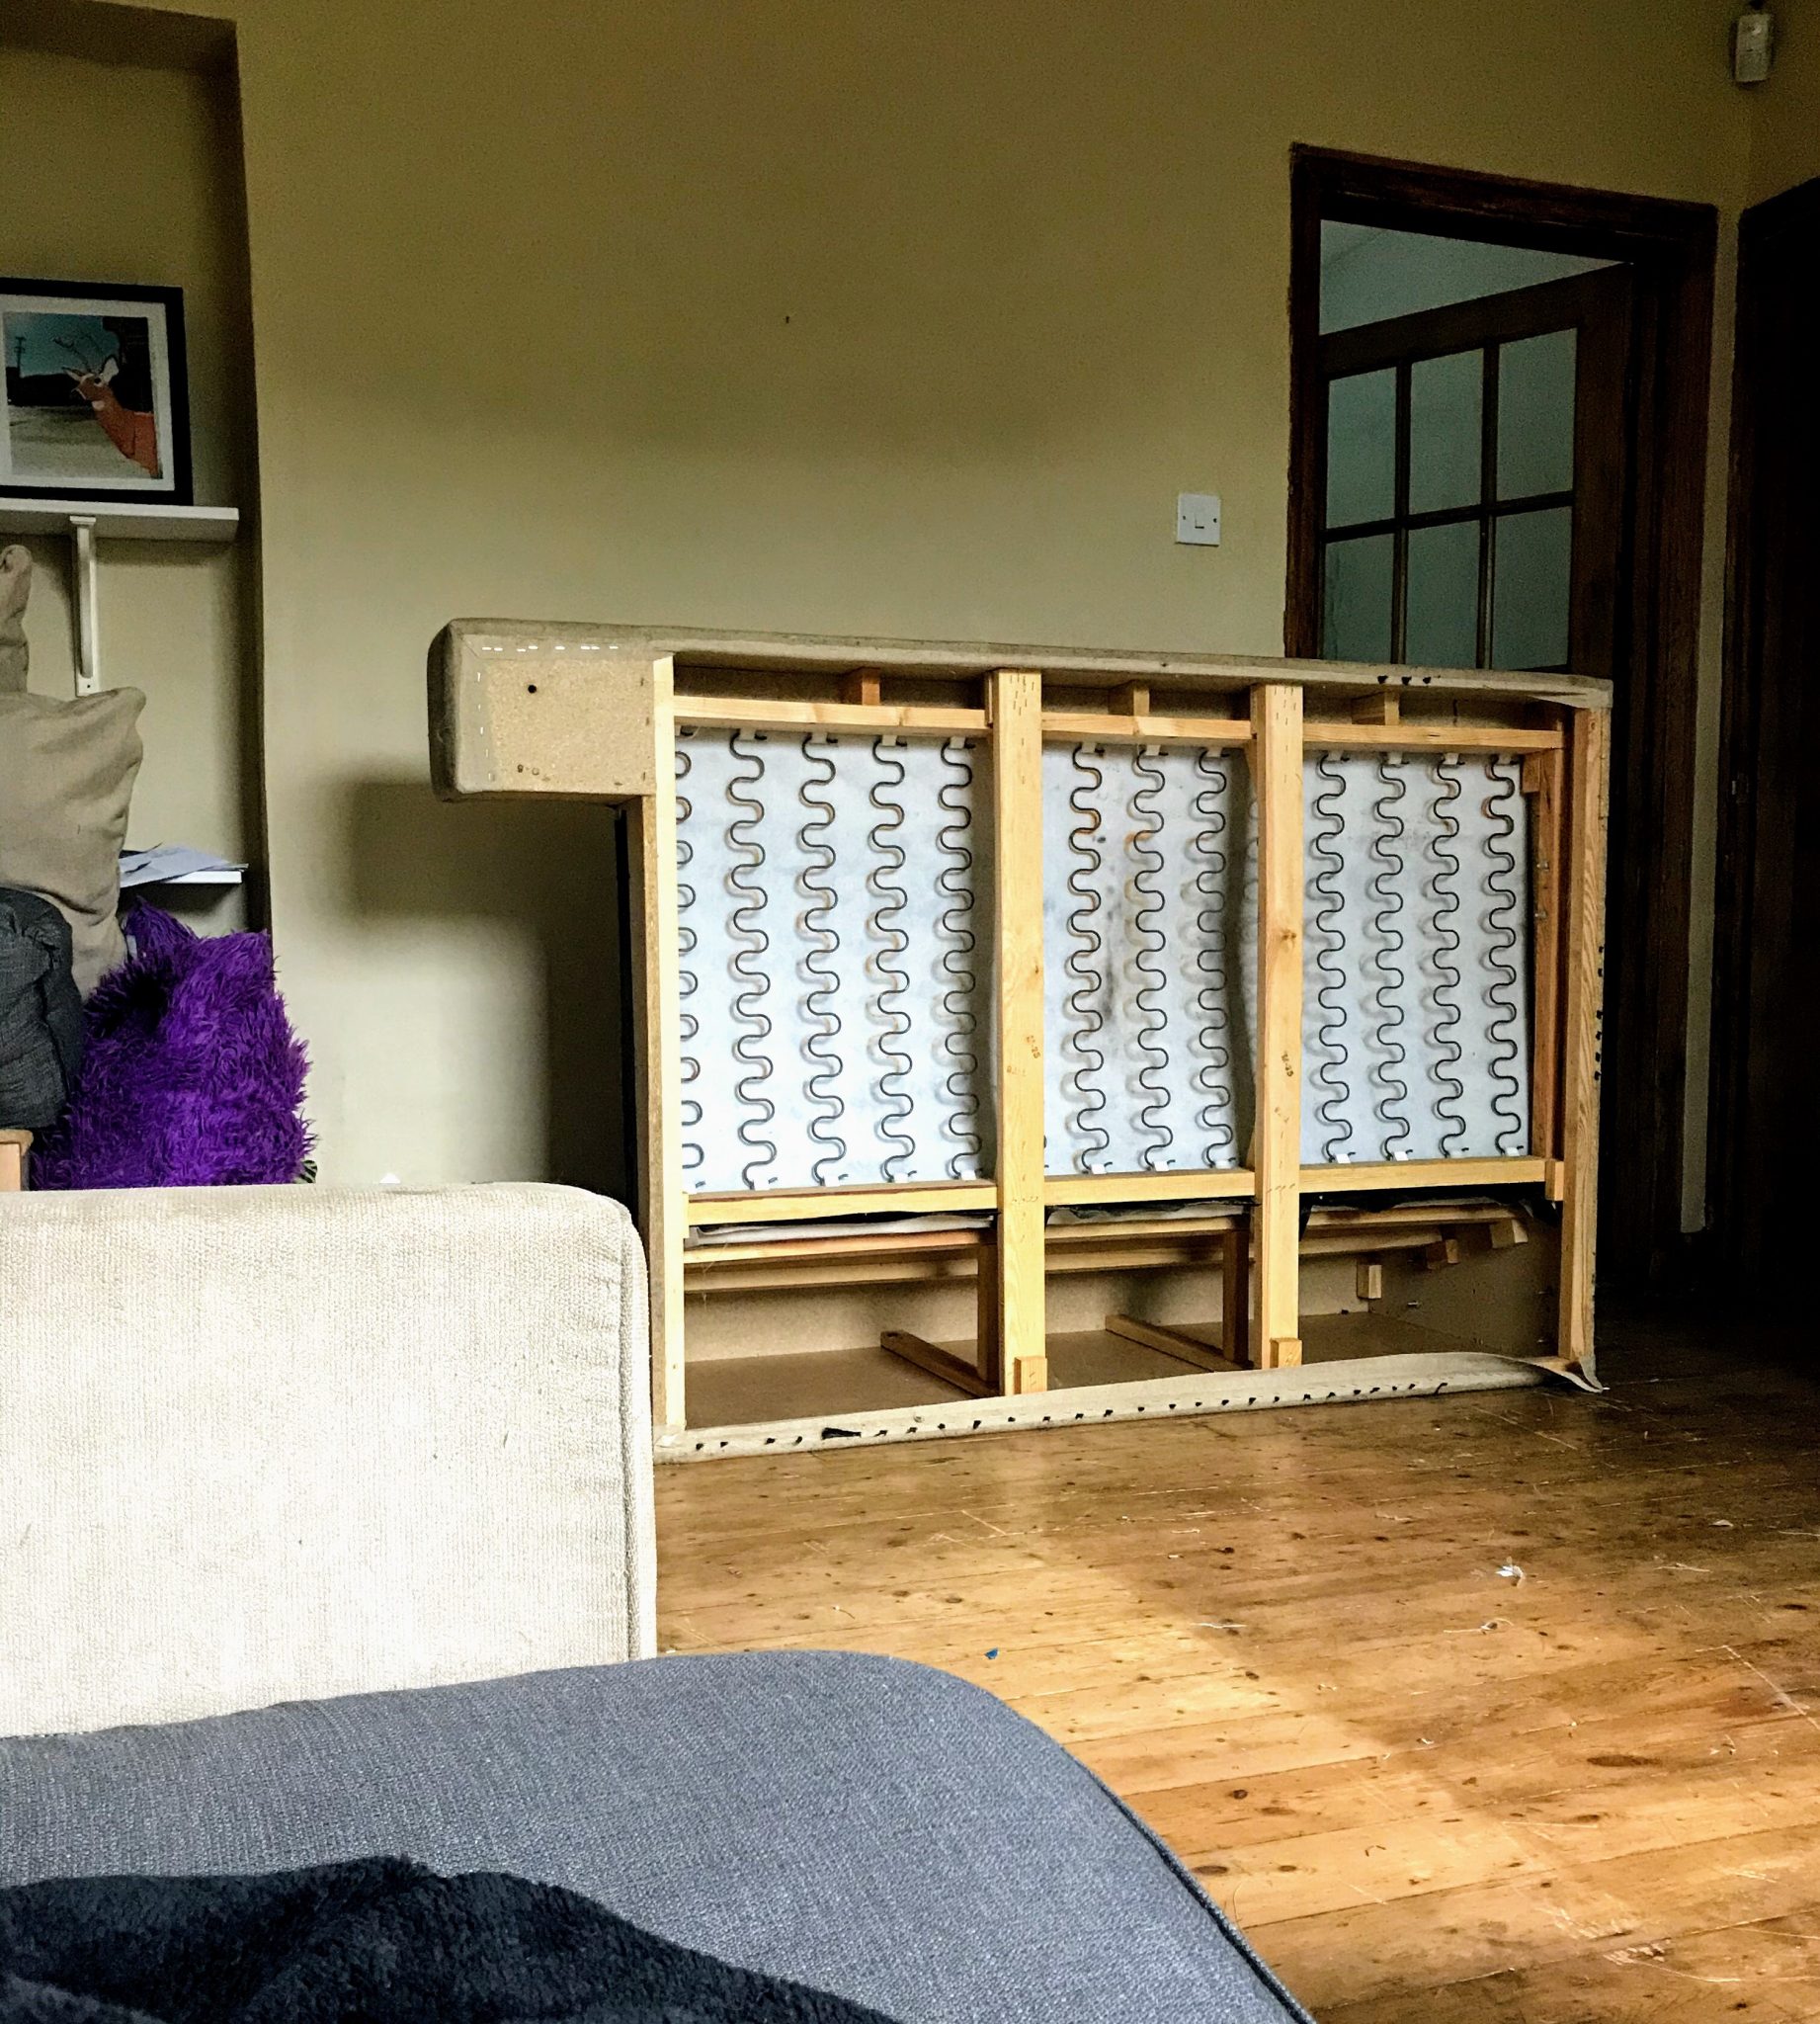
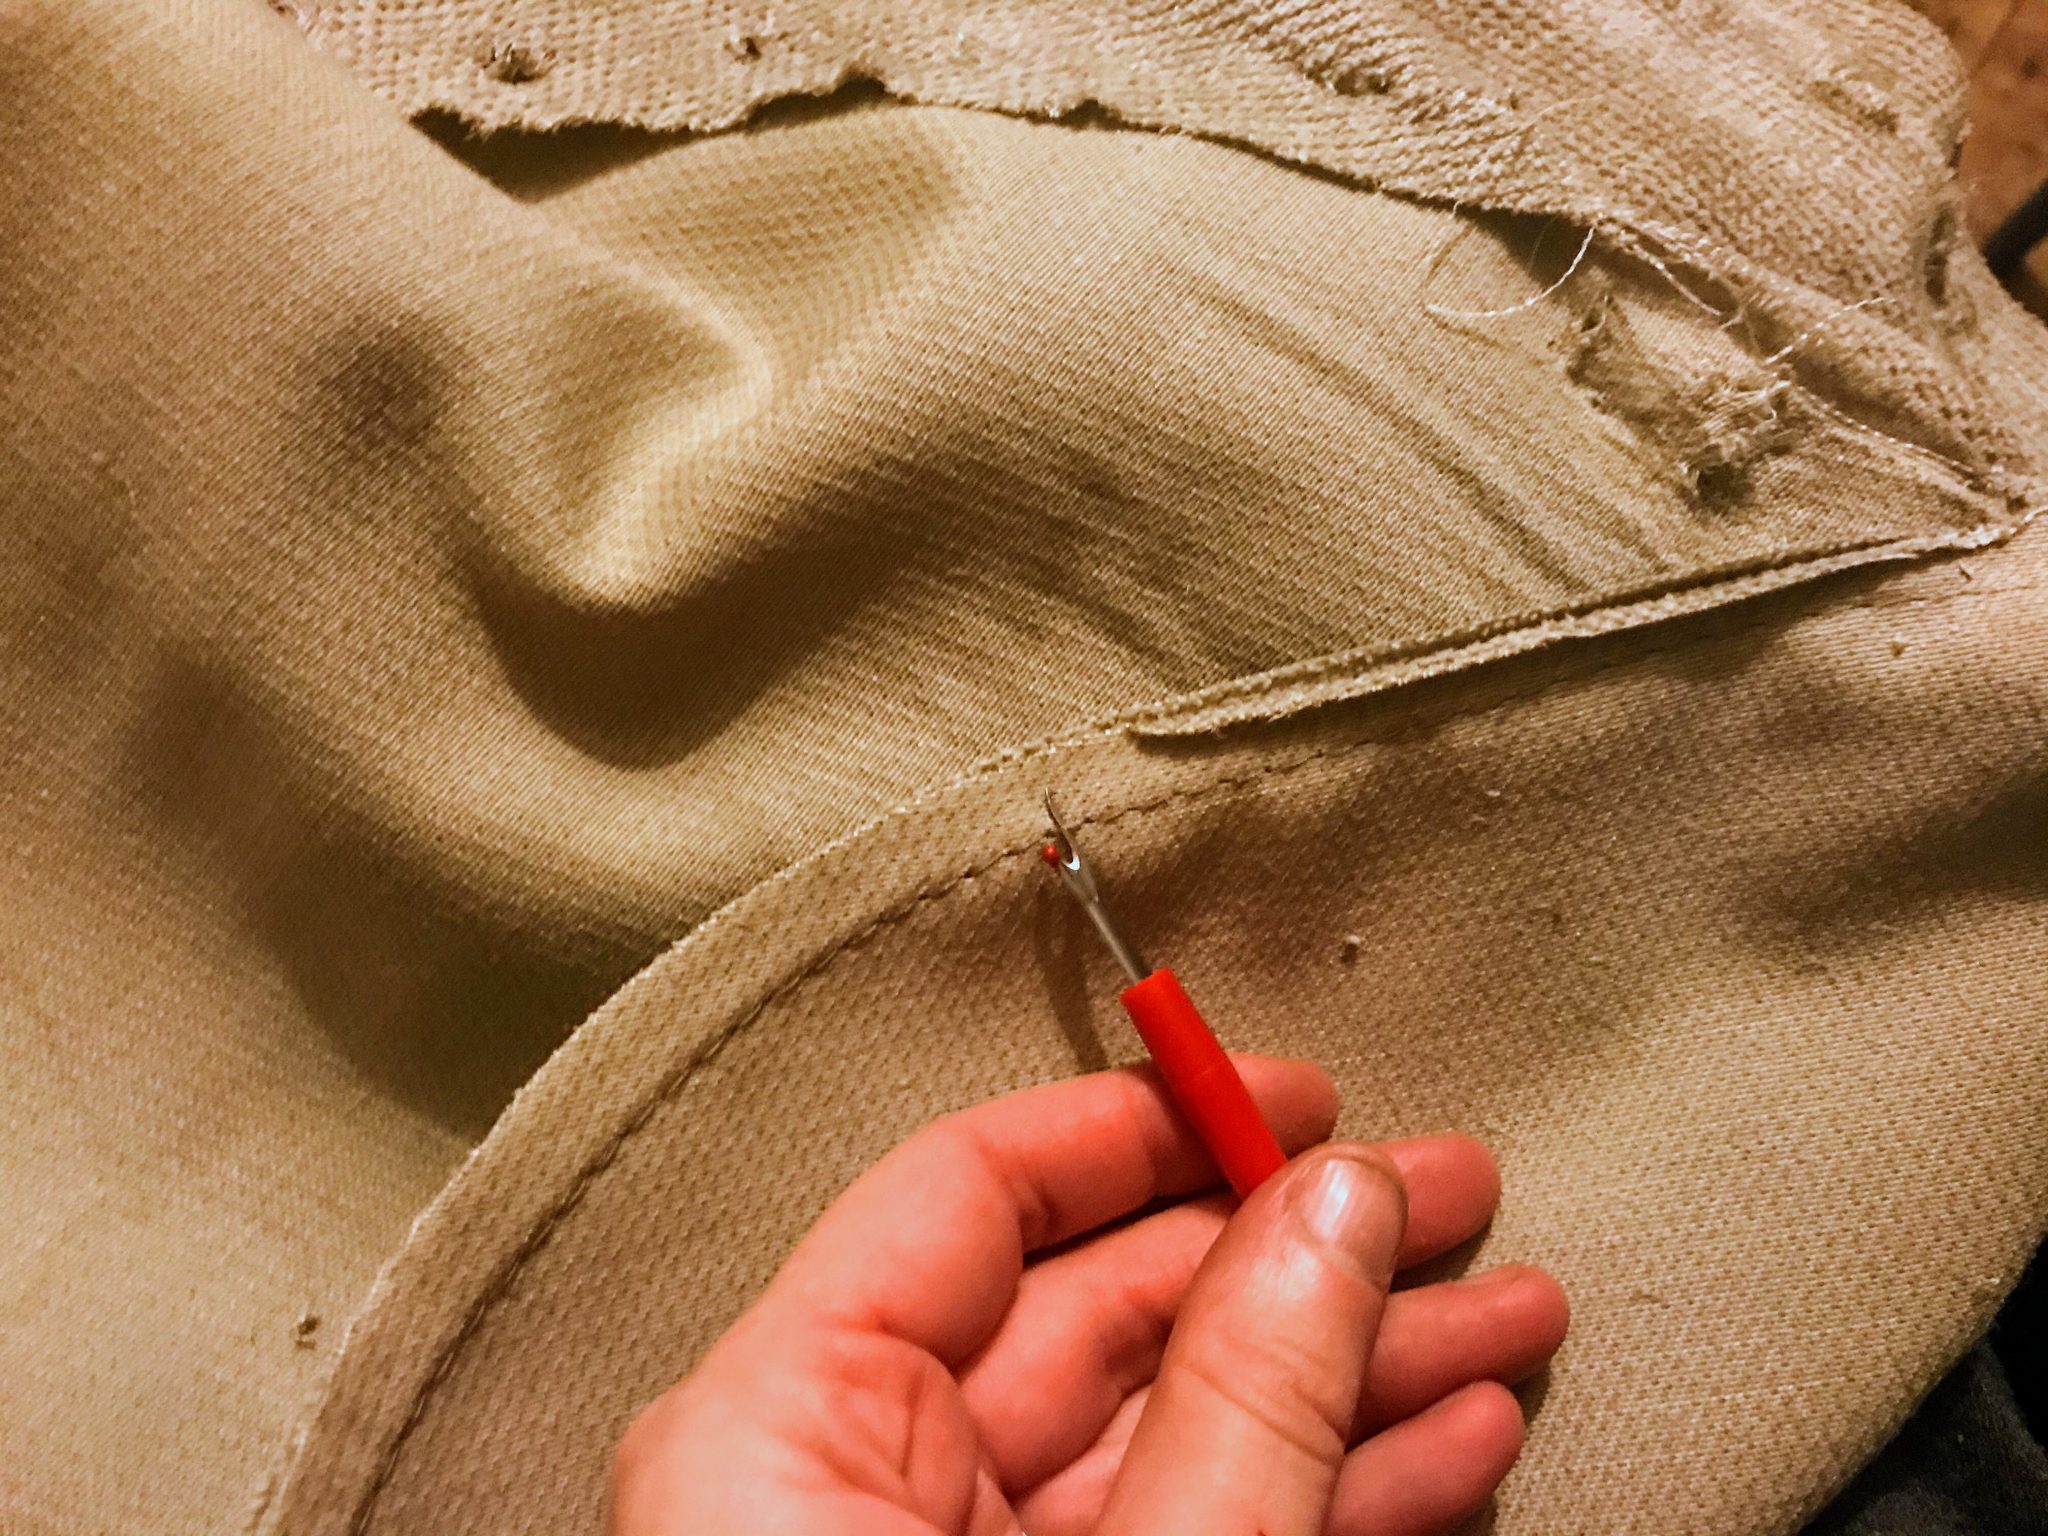
3. Now take the staples out of the covers that go underneath your sofa and make your way from there.
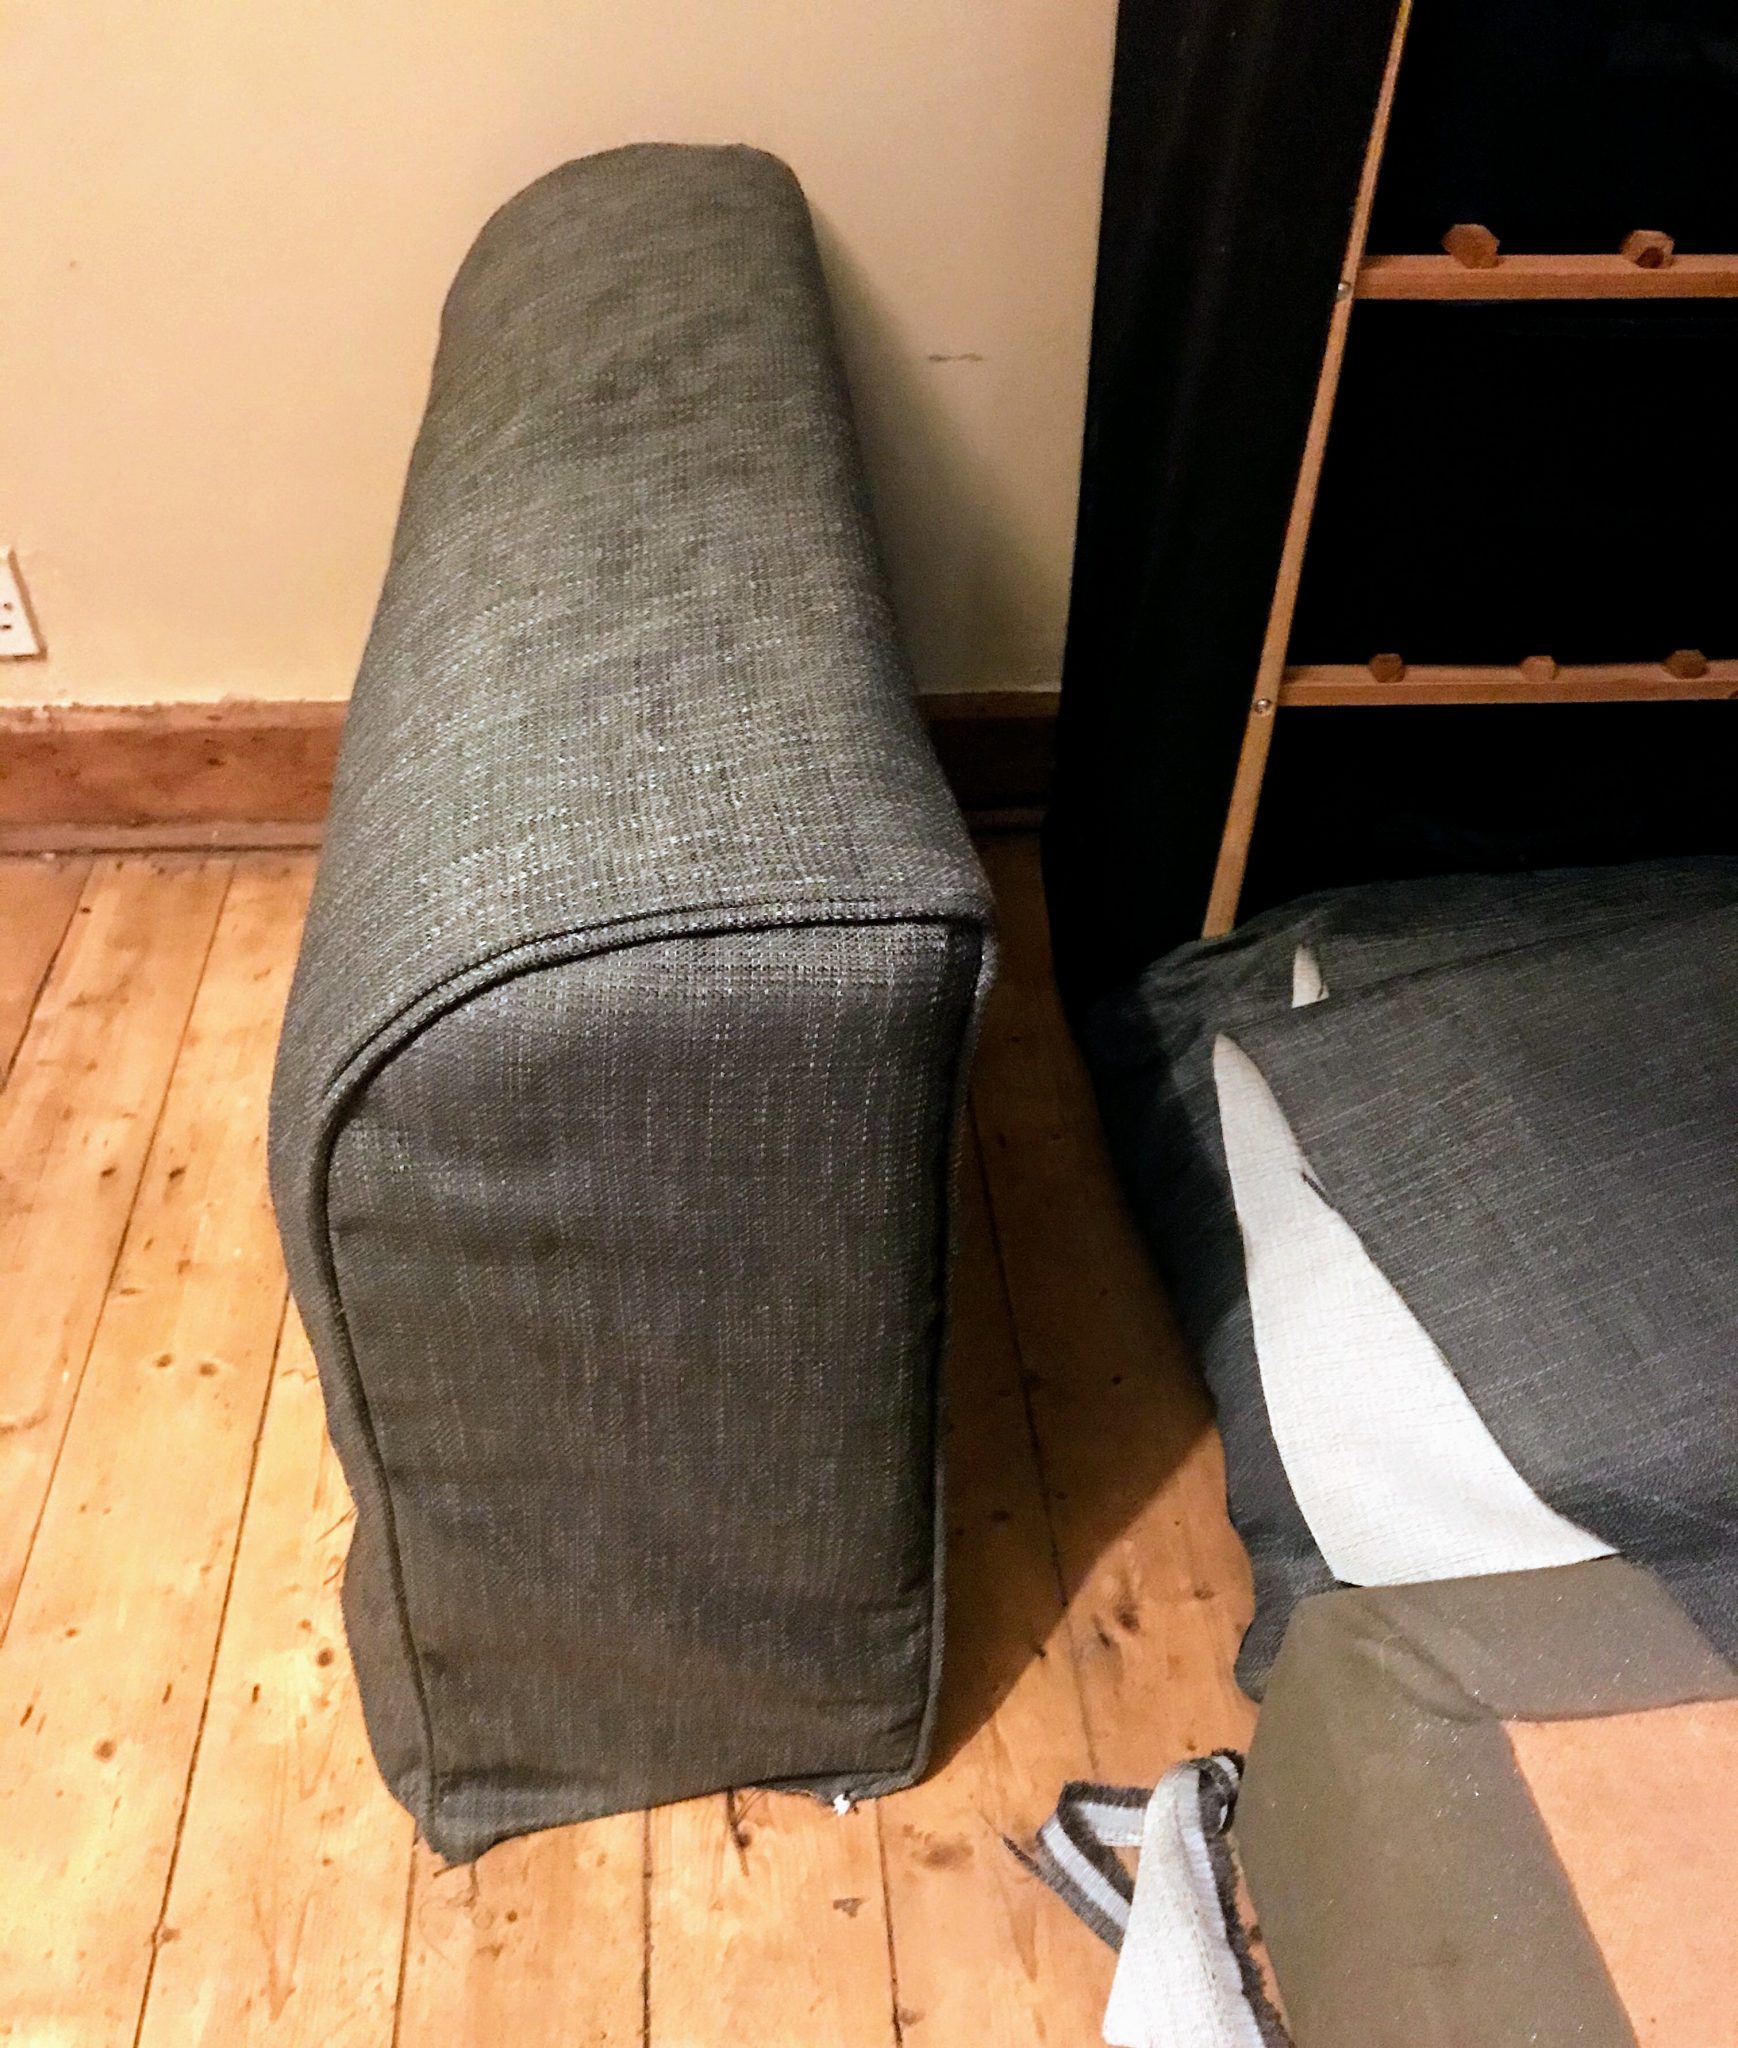
4. Peel off the pieces of fabric and then take pictures of how they are assembled to help you later.

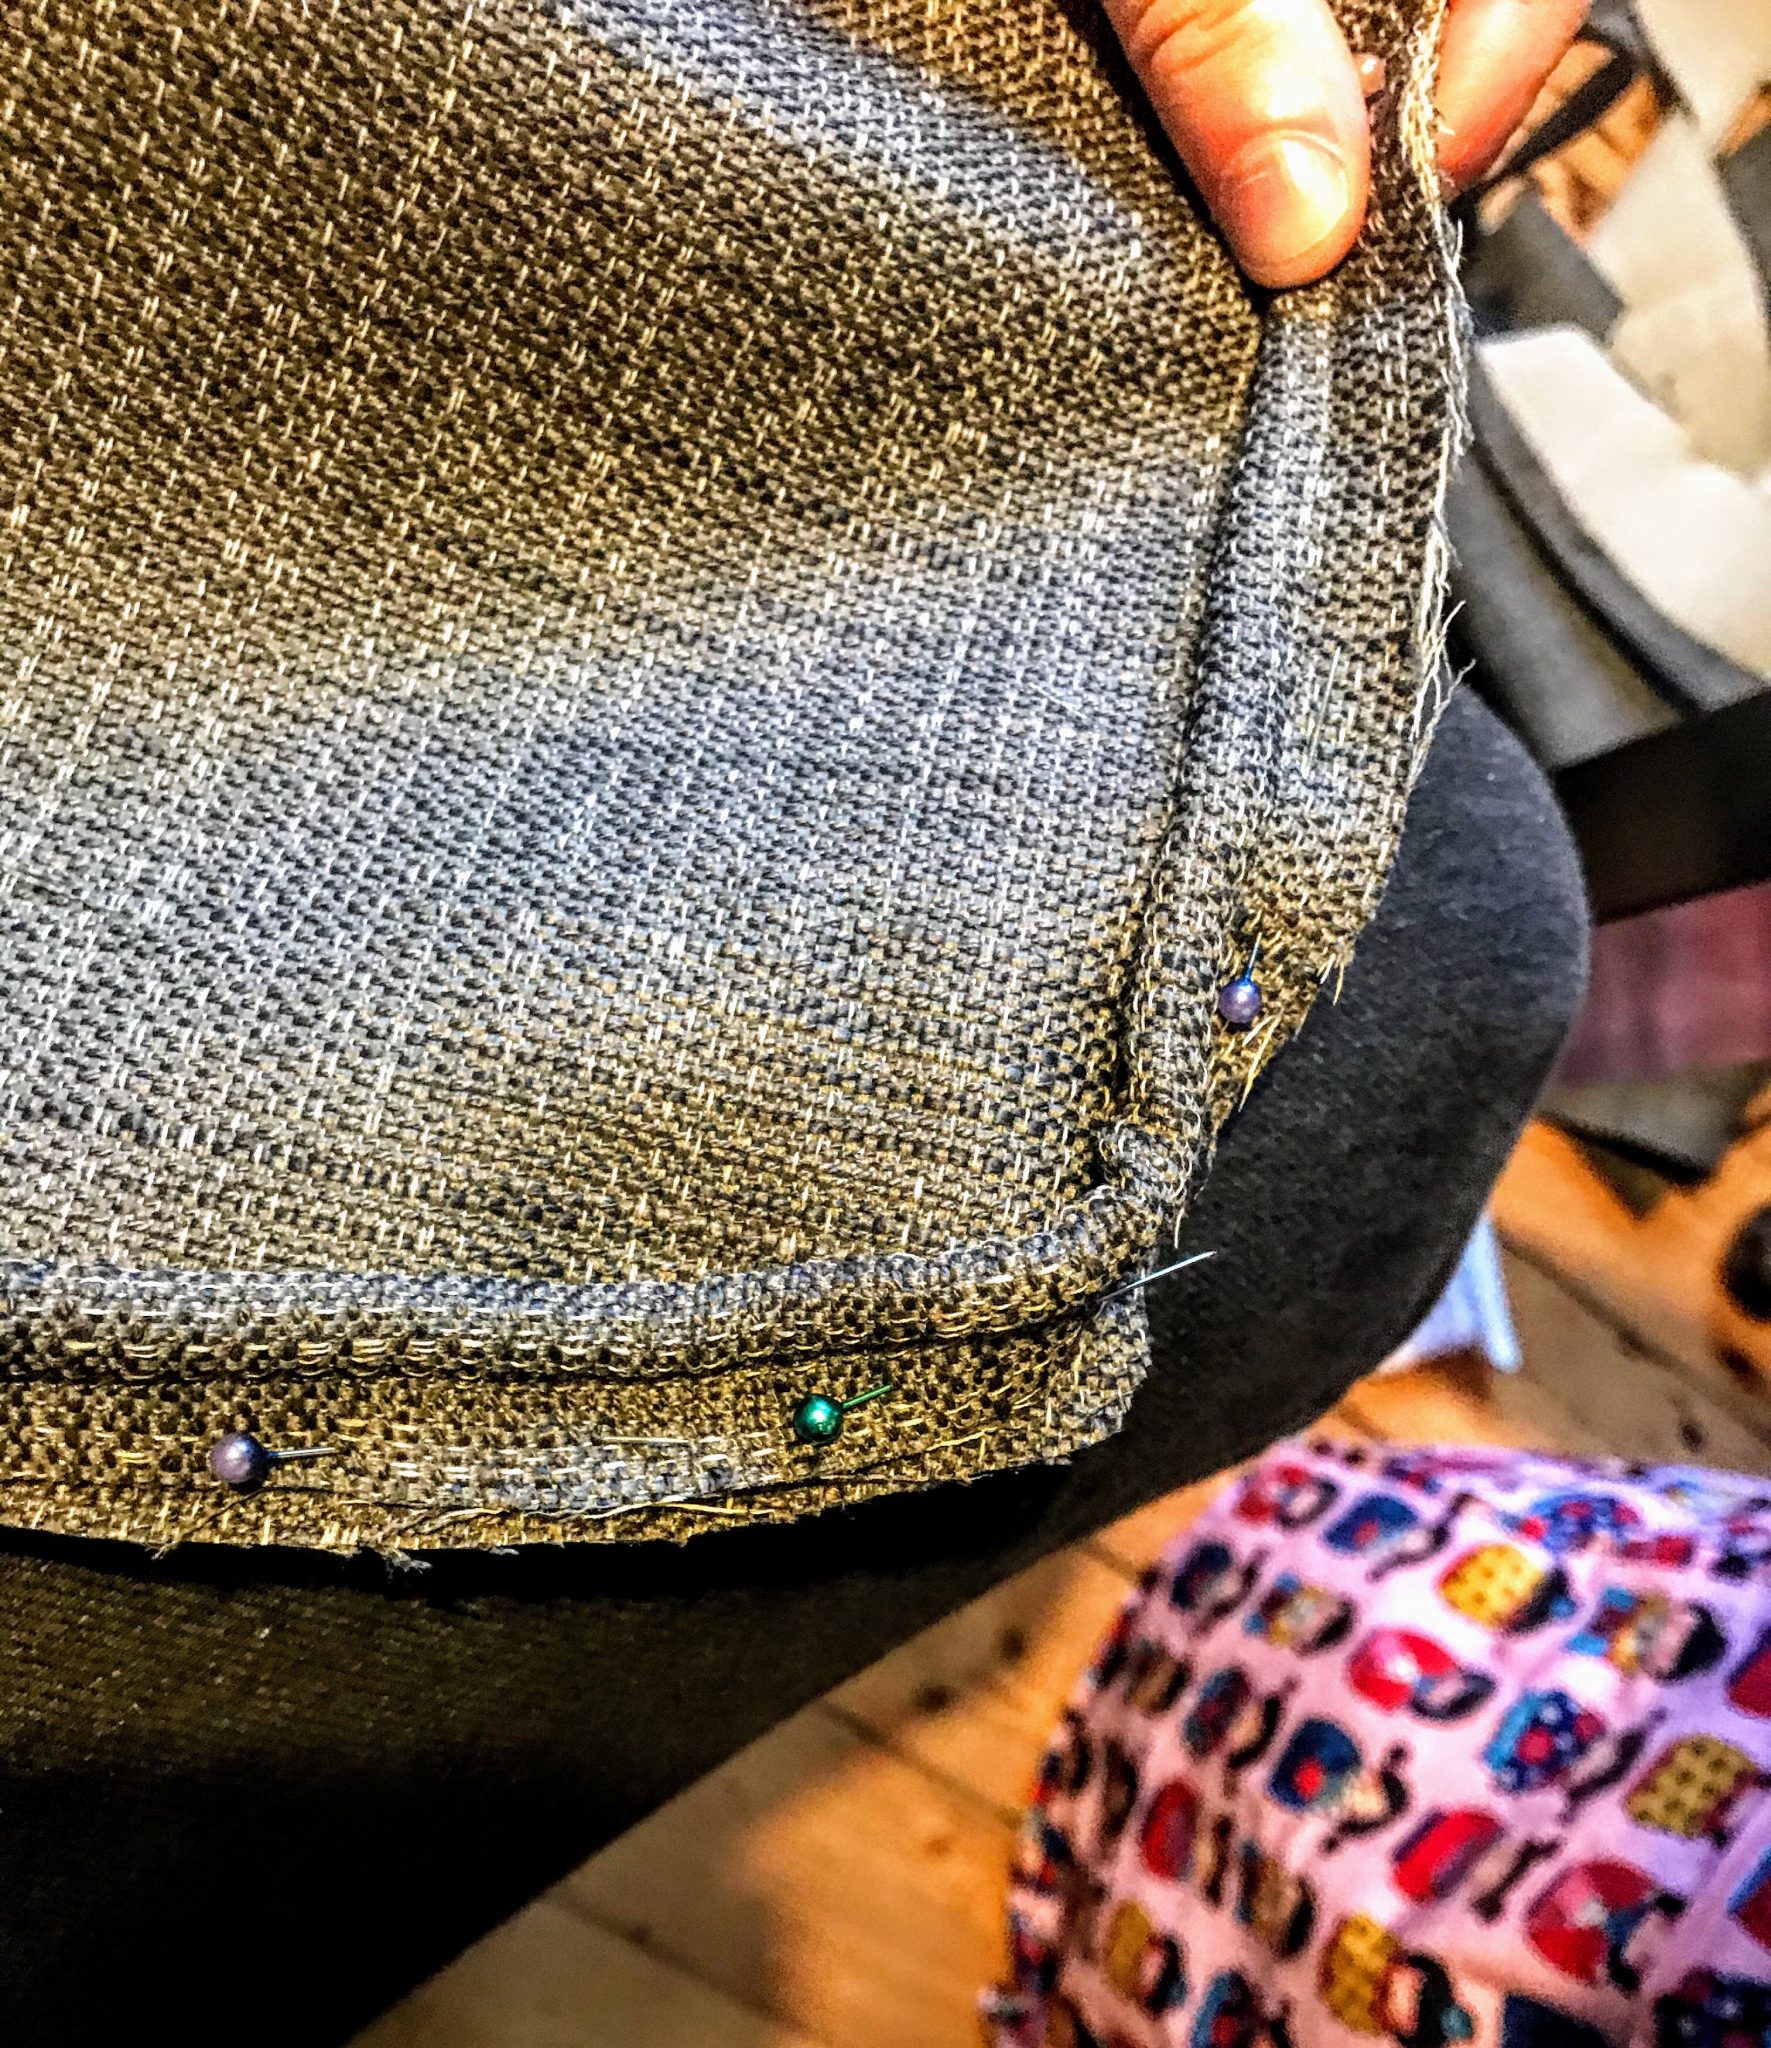
5. Unpick the covers using small scissors or an unpicker so that they are in flat pieces.
6. Lay your flat pieces onto your new fabric. Make sure the fabric grain and pattern is going the right way! Pin or weight your pieces in place. Cut around them to make your new pieces. Use black fabric for the bottom of the sofa and underneath the seats.
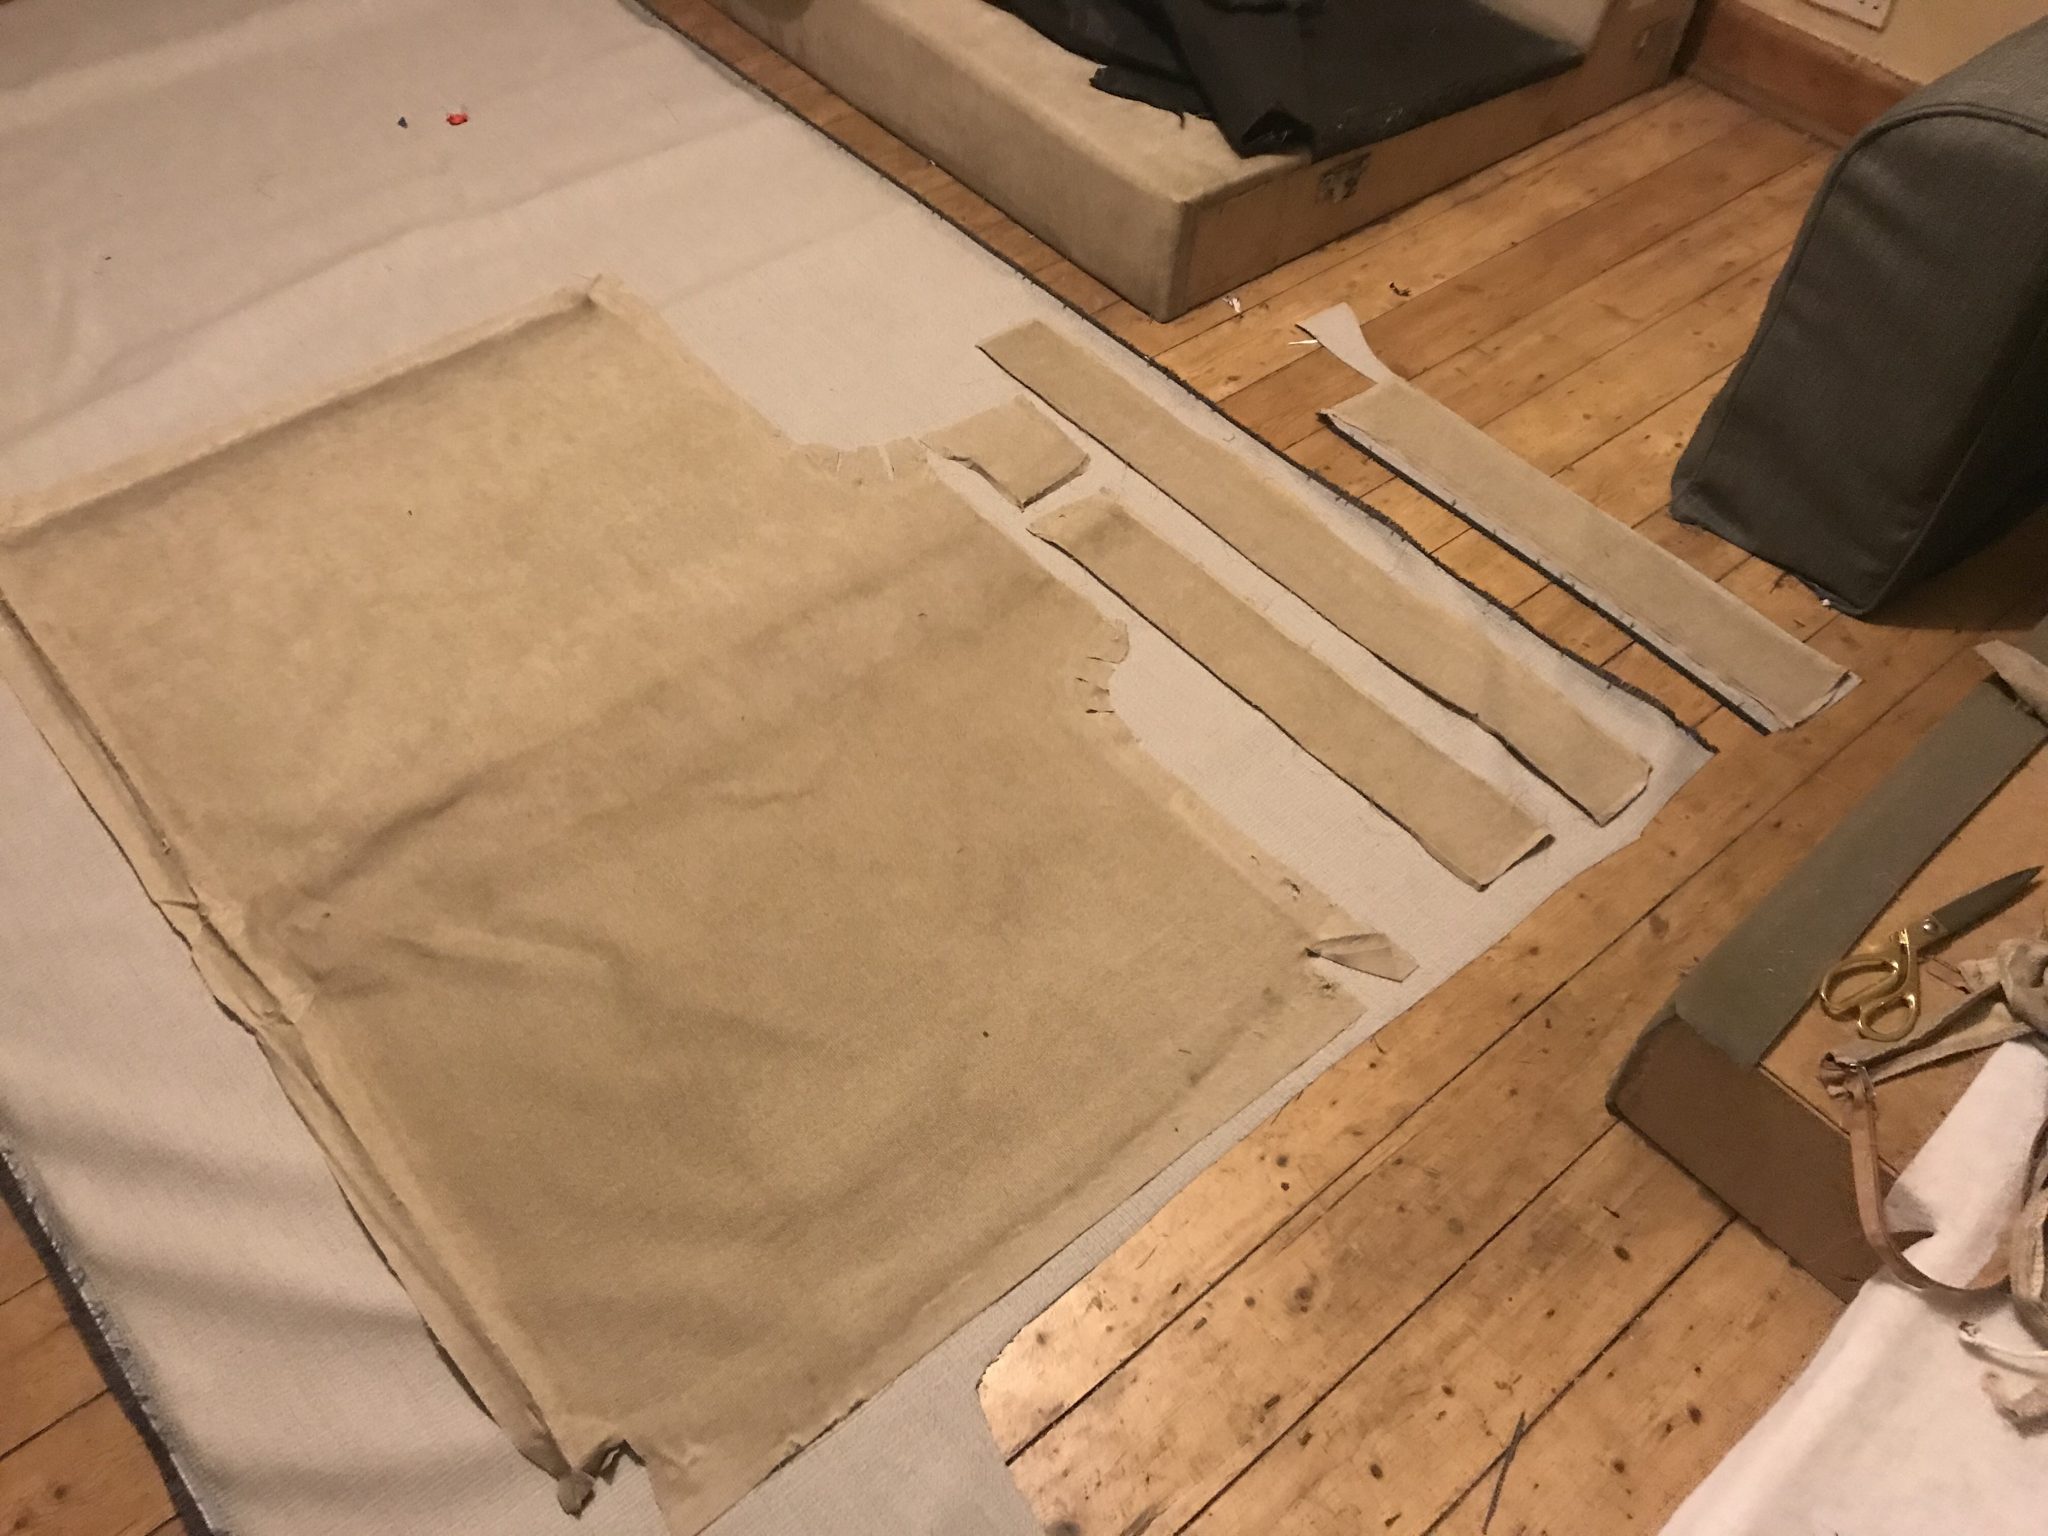
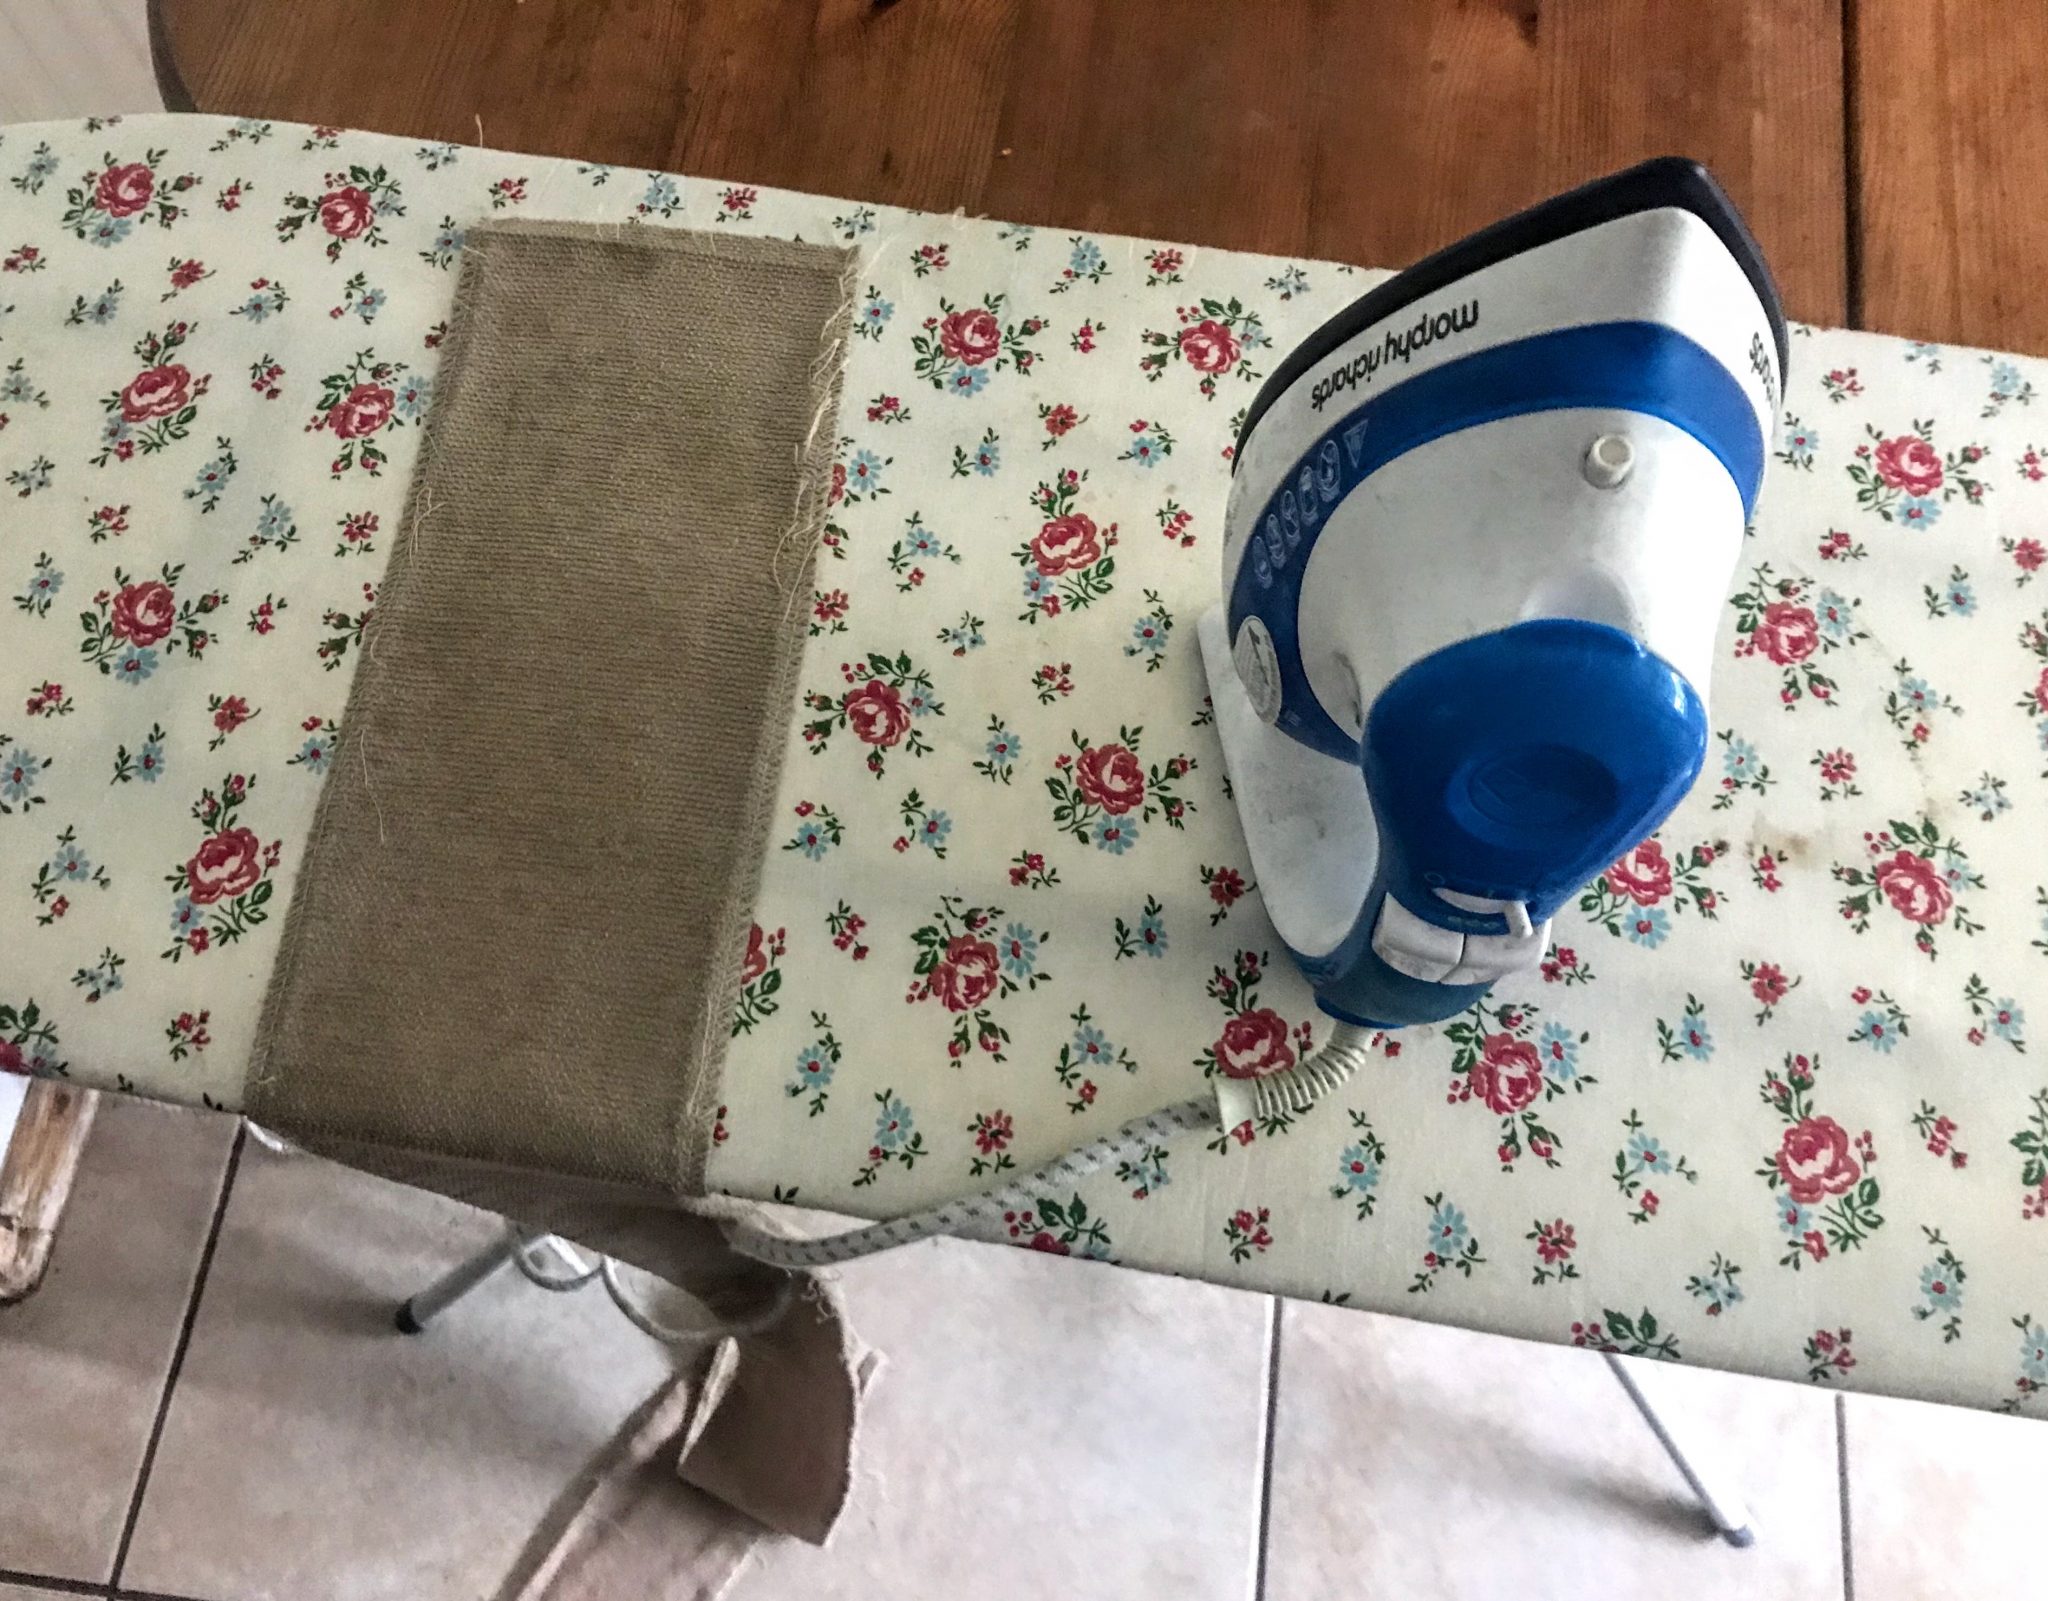
Iron the pieces flat if they’re not flat already so you can cut around them.
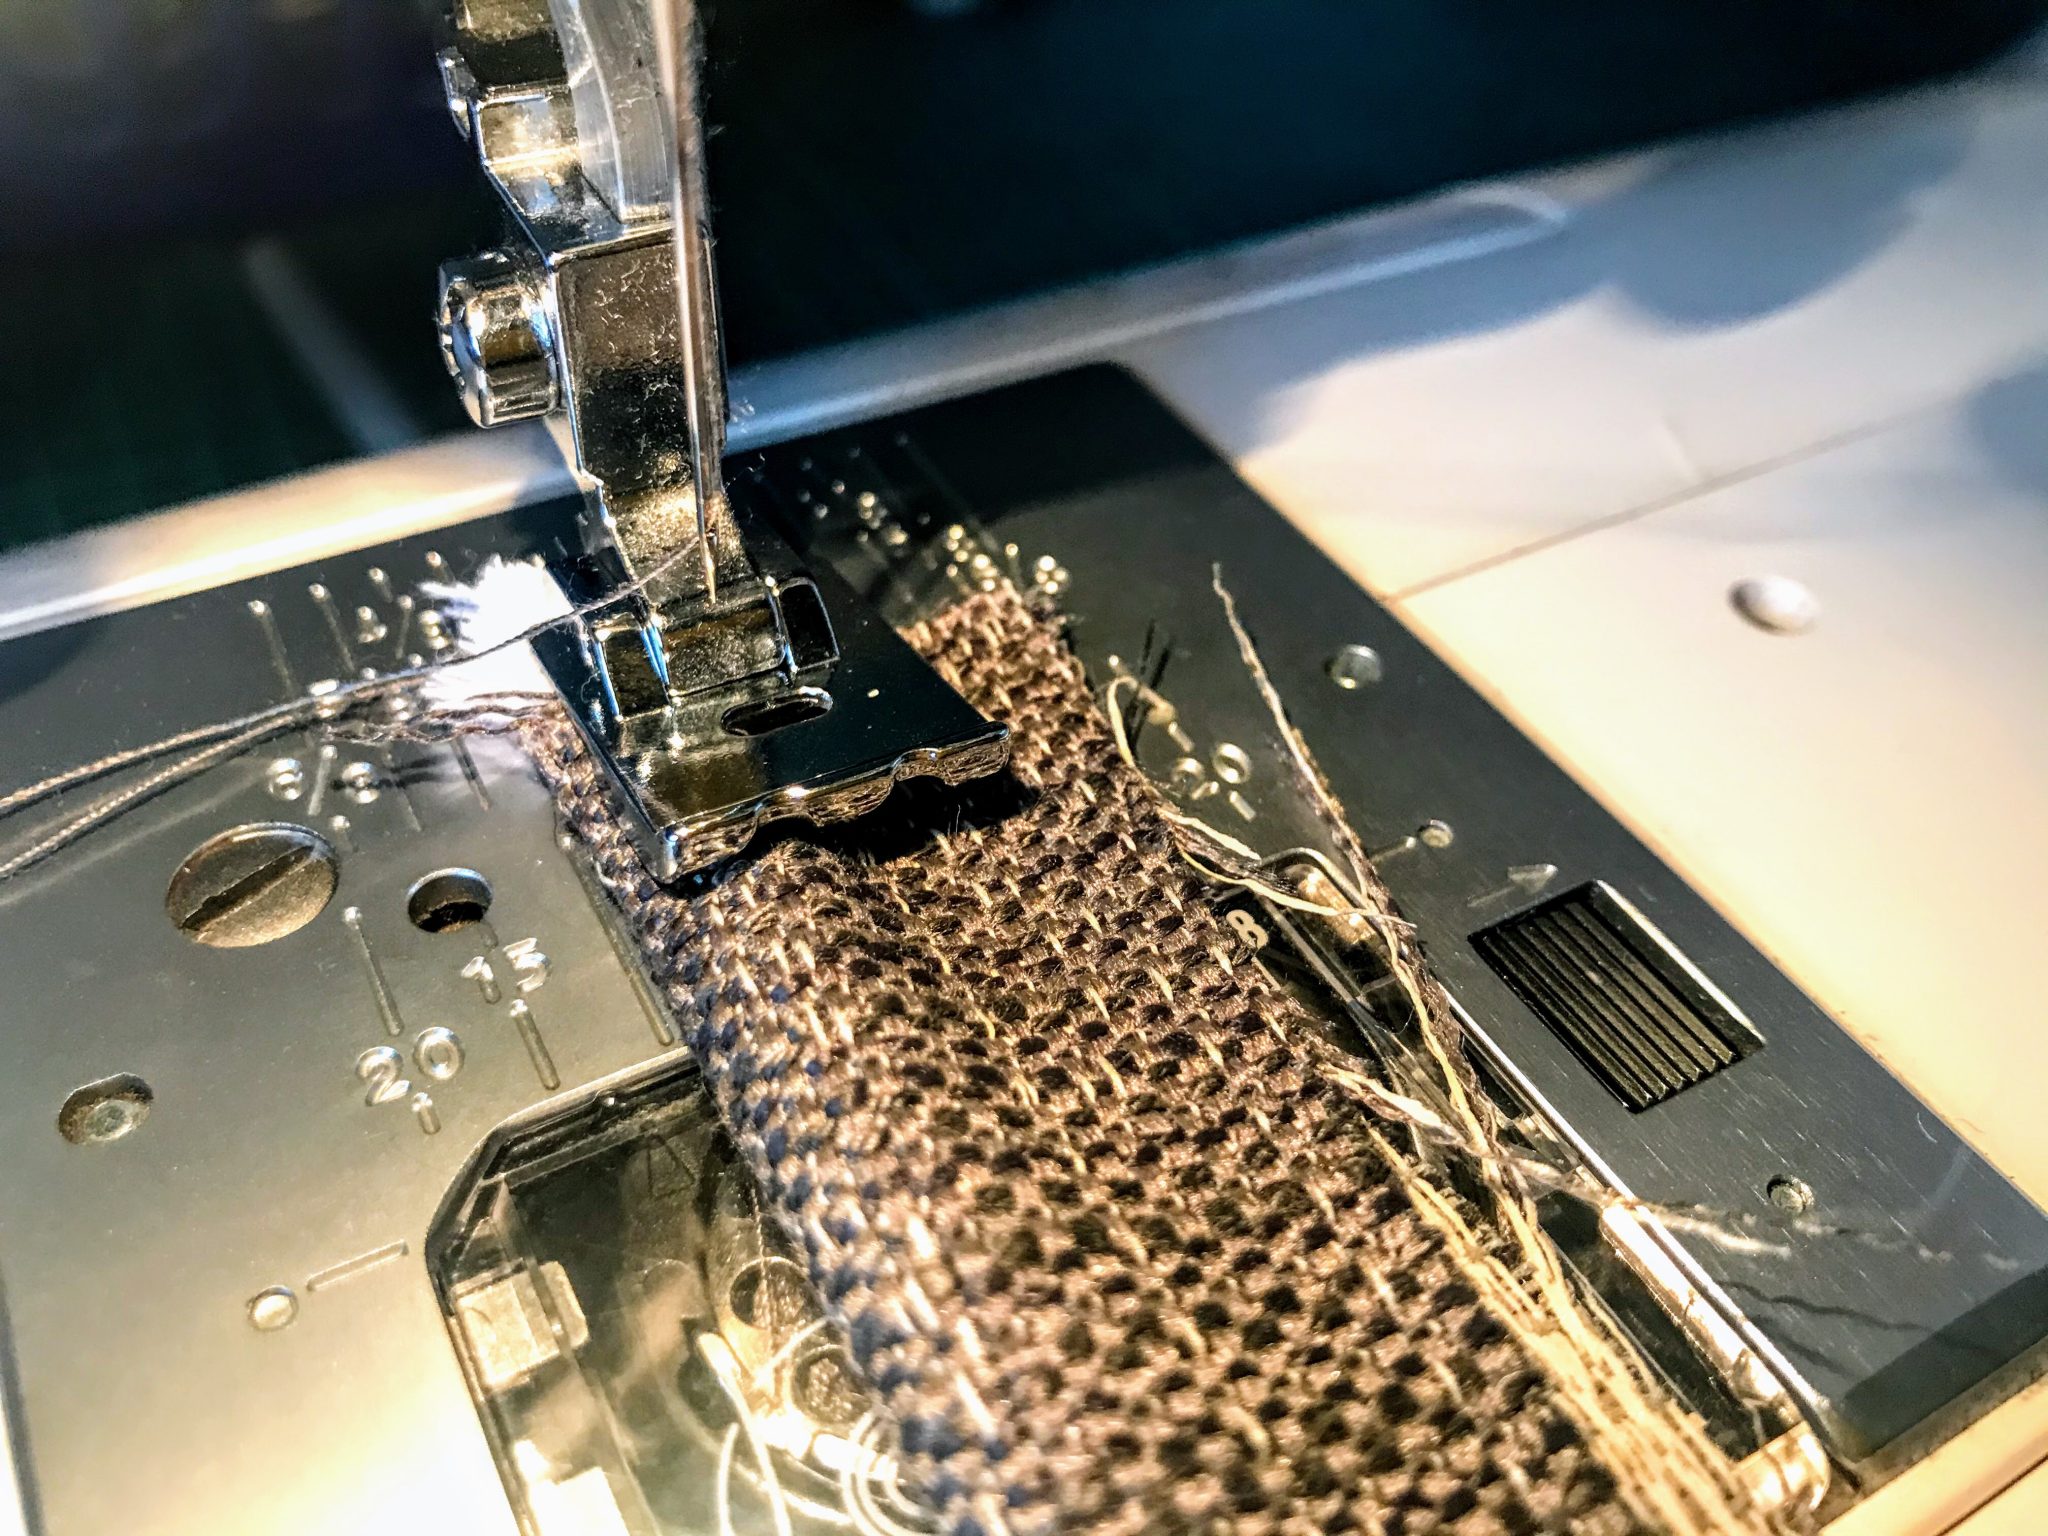
7. Create your piping if necessary. Create piping by cutting strips of fabric and sewing them around the cords. Use a piping foot on your sewing machine to make it easier to sew around the cord neatly.
8. Sew your piping to your pattern pieces. Lay the piping onto the front side of the fabric facing inwards. Make sure to stitch close to the piping when you attach the cushions together.
9. Sew your pieces back together in the same way as the originals.
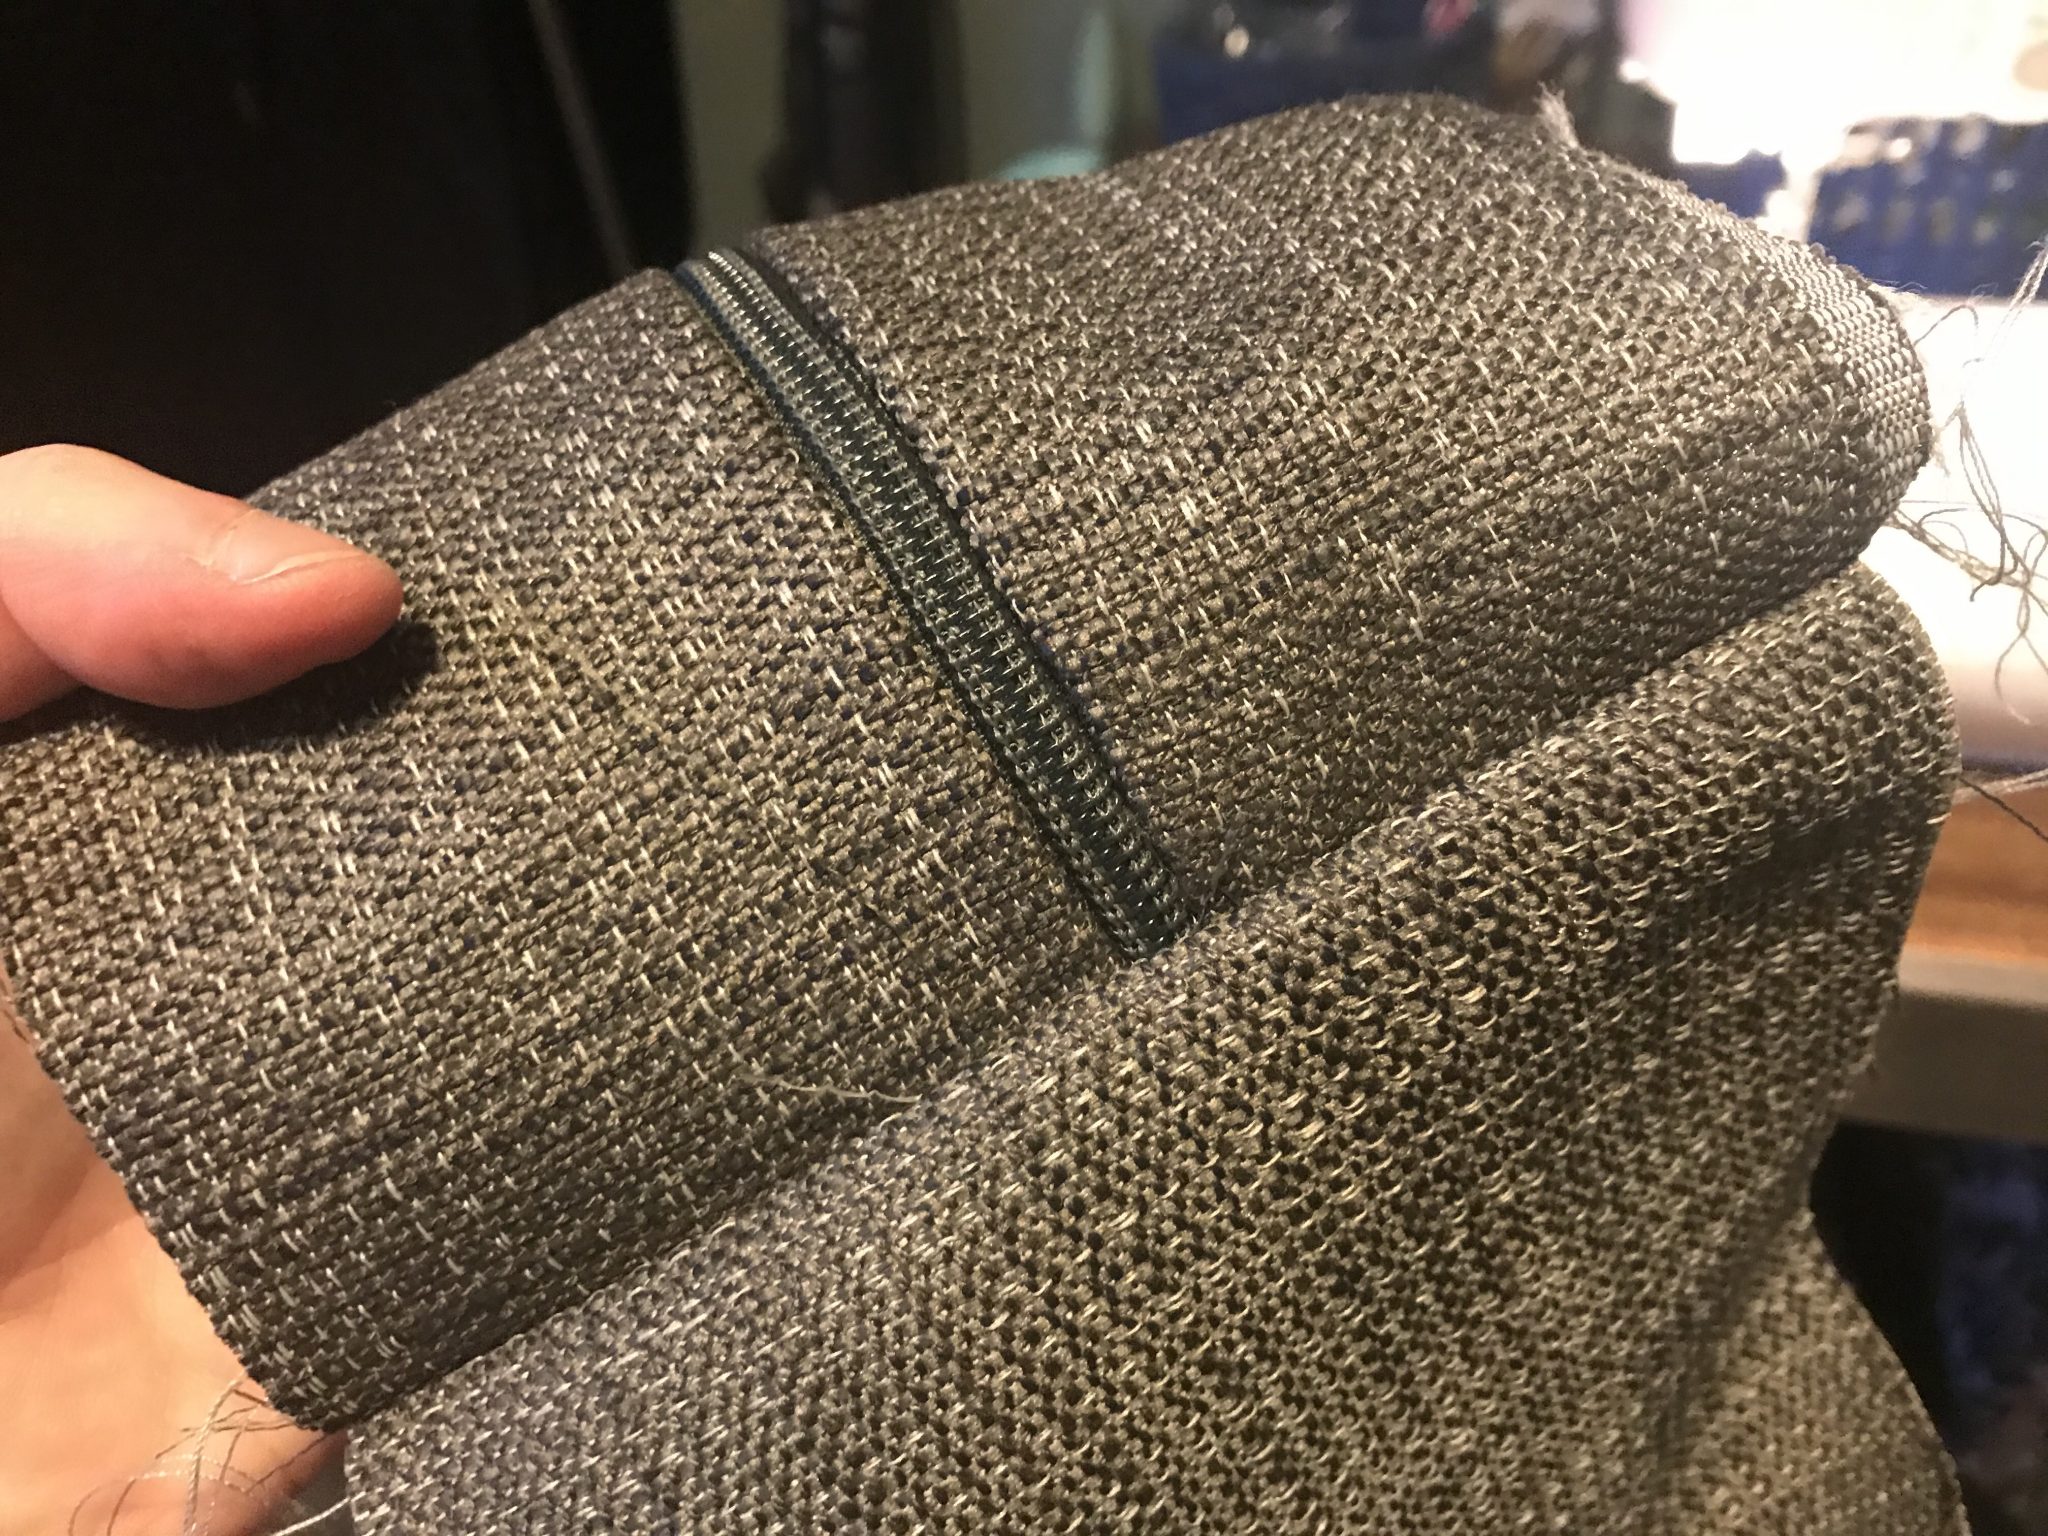
10. Put your zips in. Use the picture below as a reference, pin the zip onto the front sides of the fabric and sew it on.
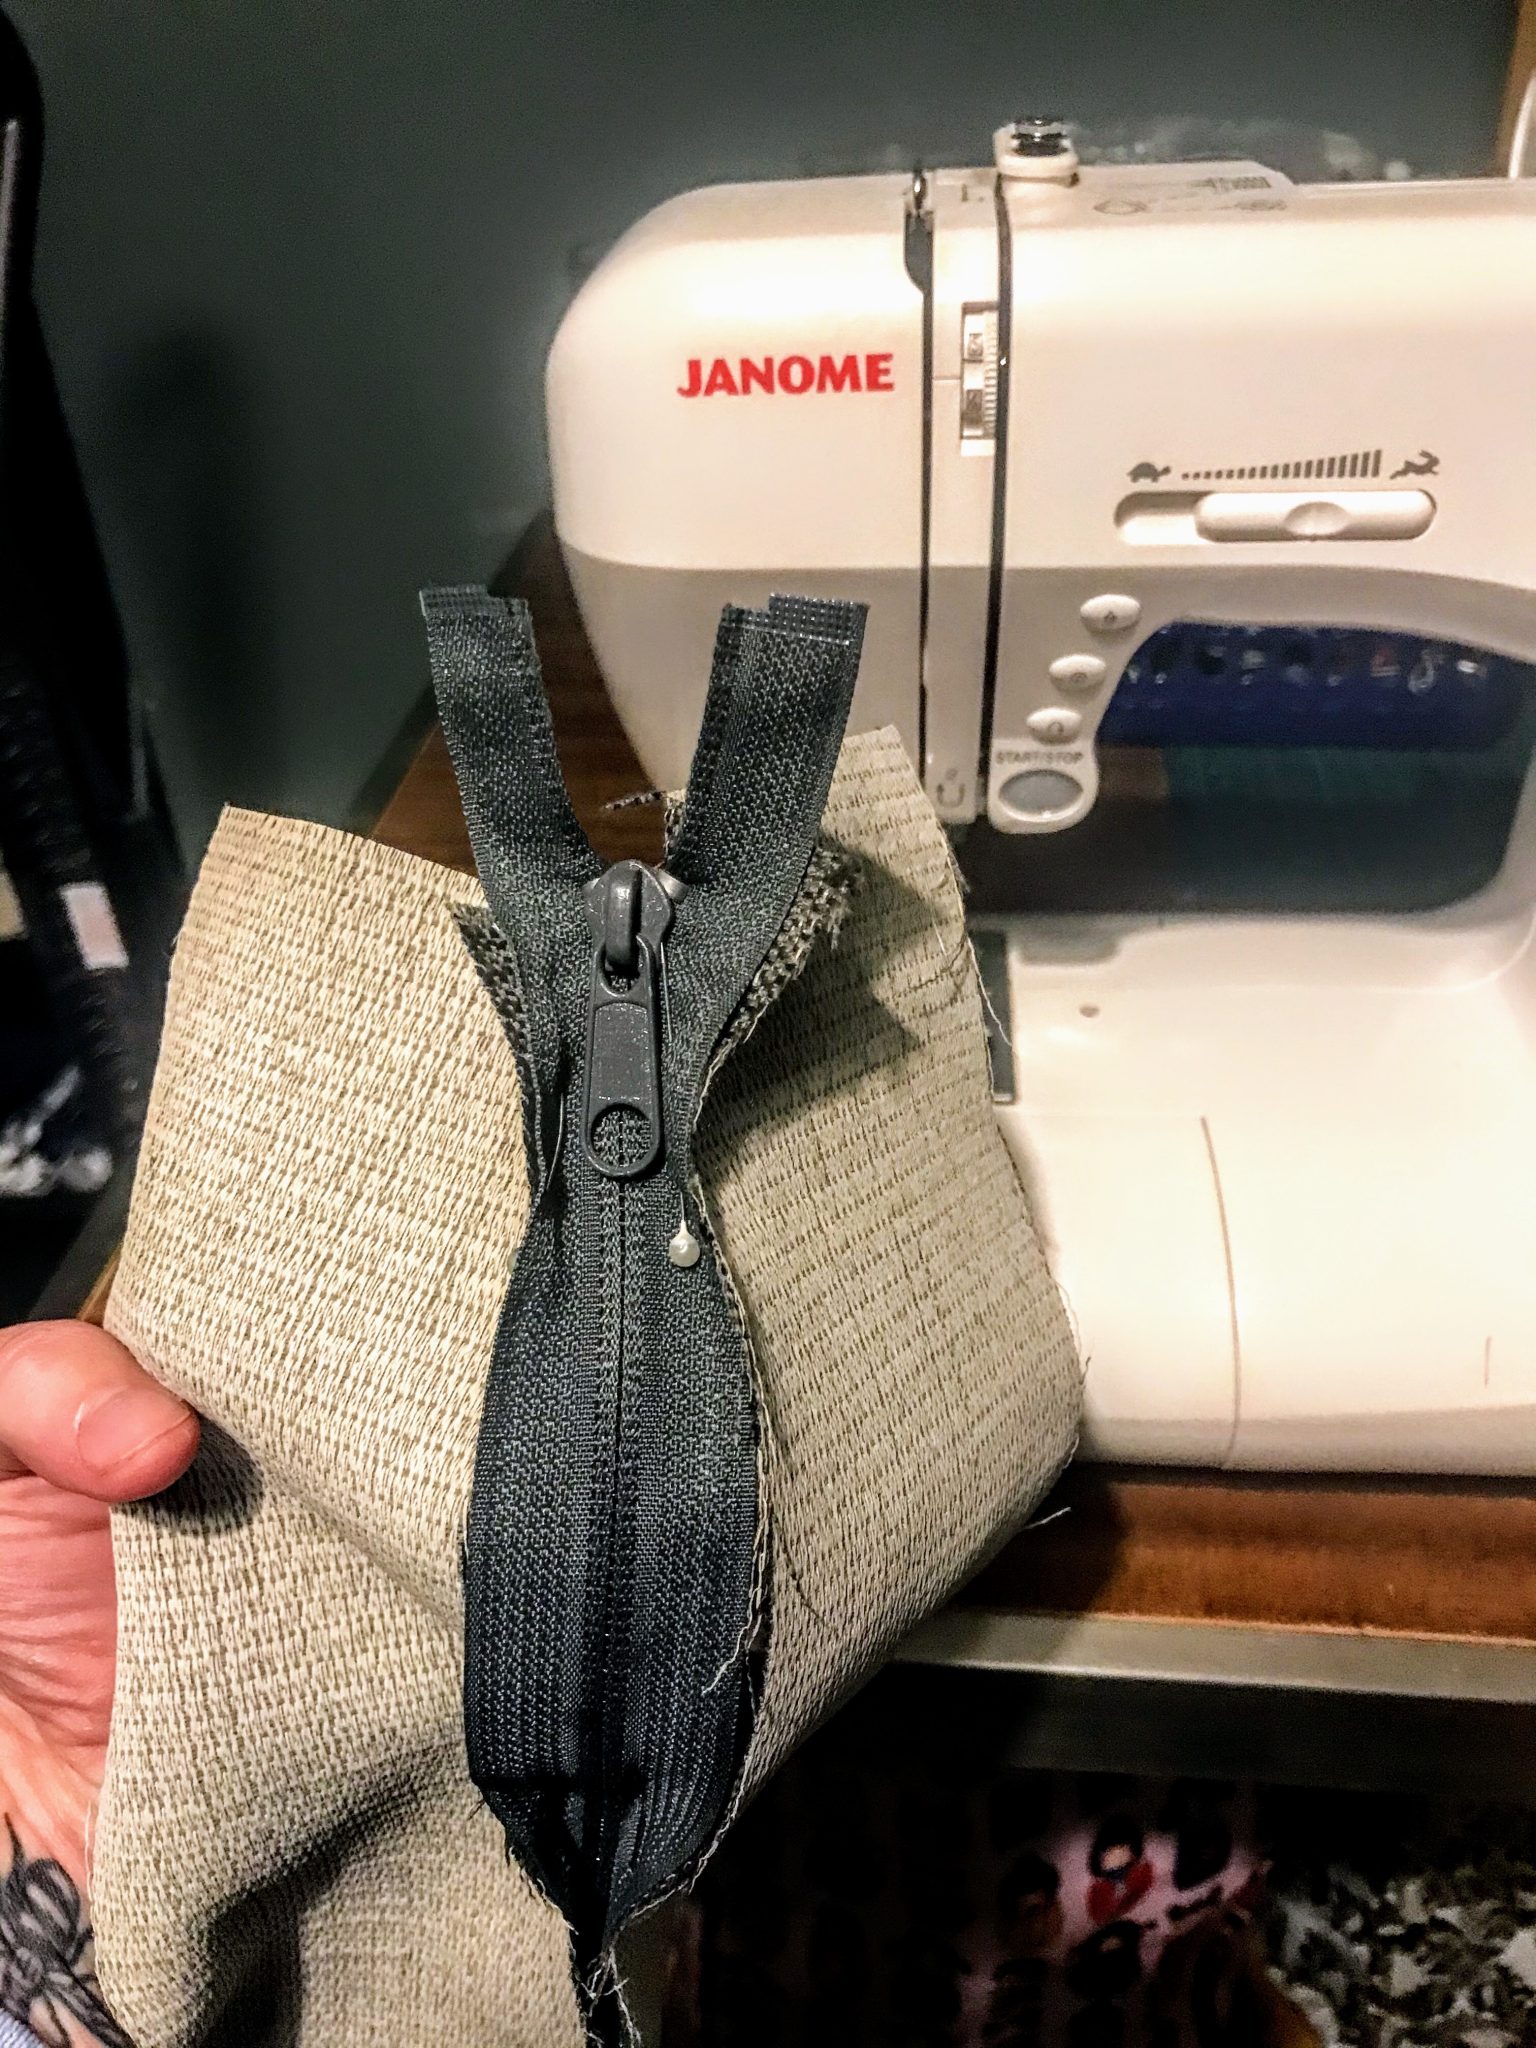
To stop your ends being messy, sew over the ends of your zip and then attach the next piece to disguise the end of the zip neatly.
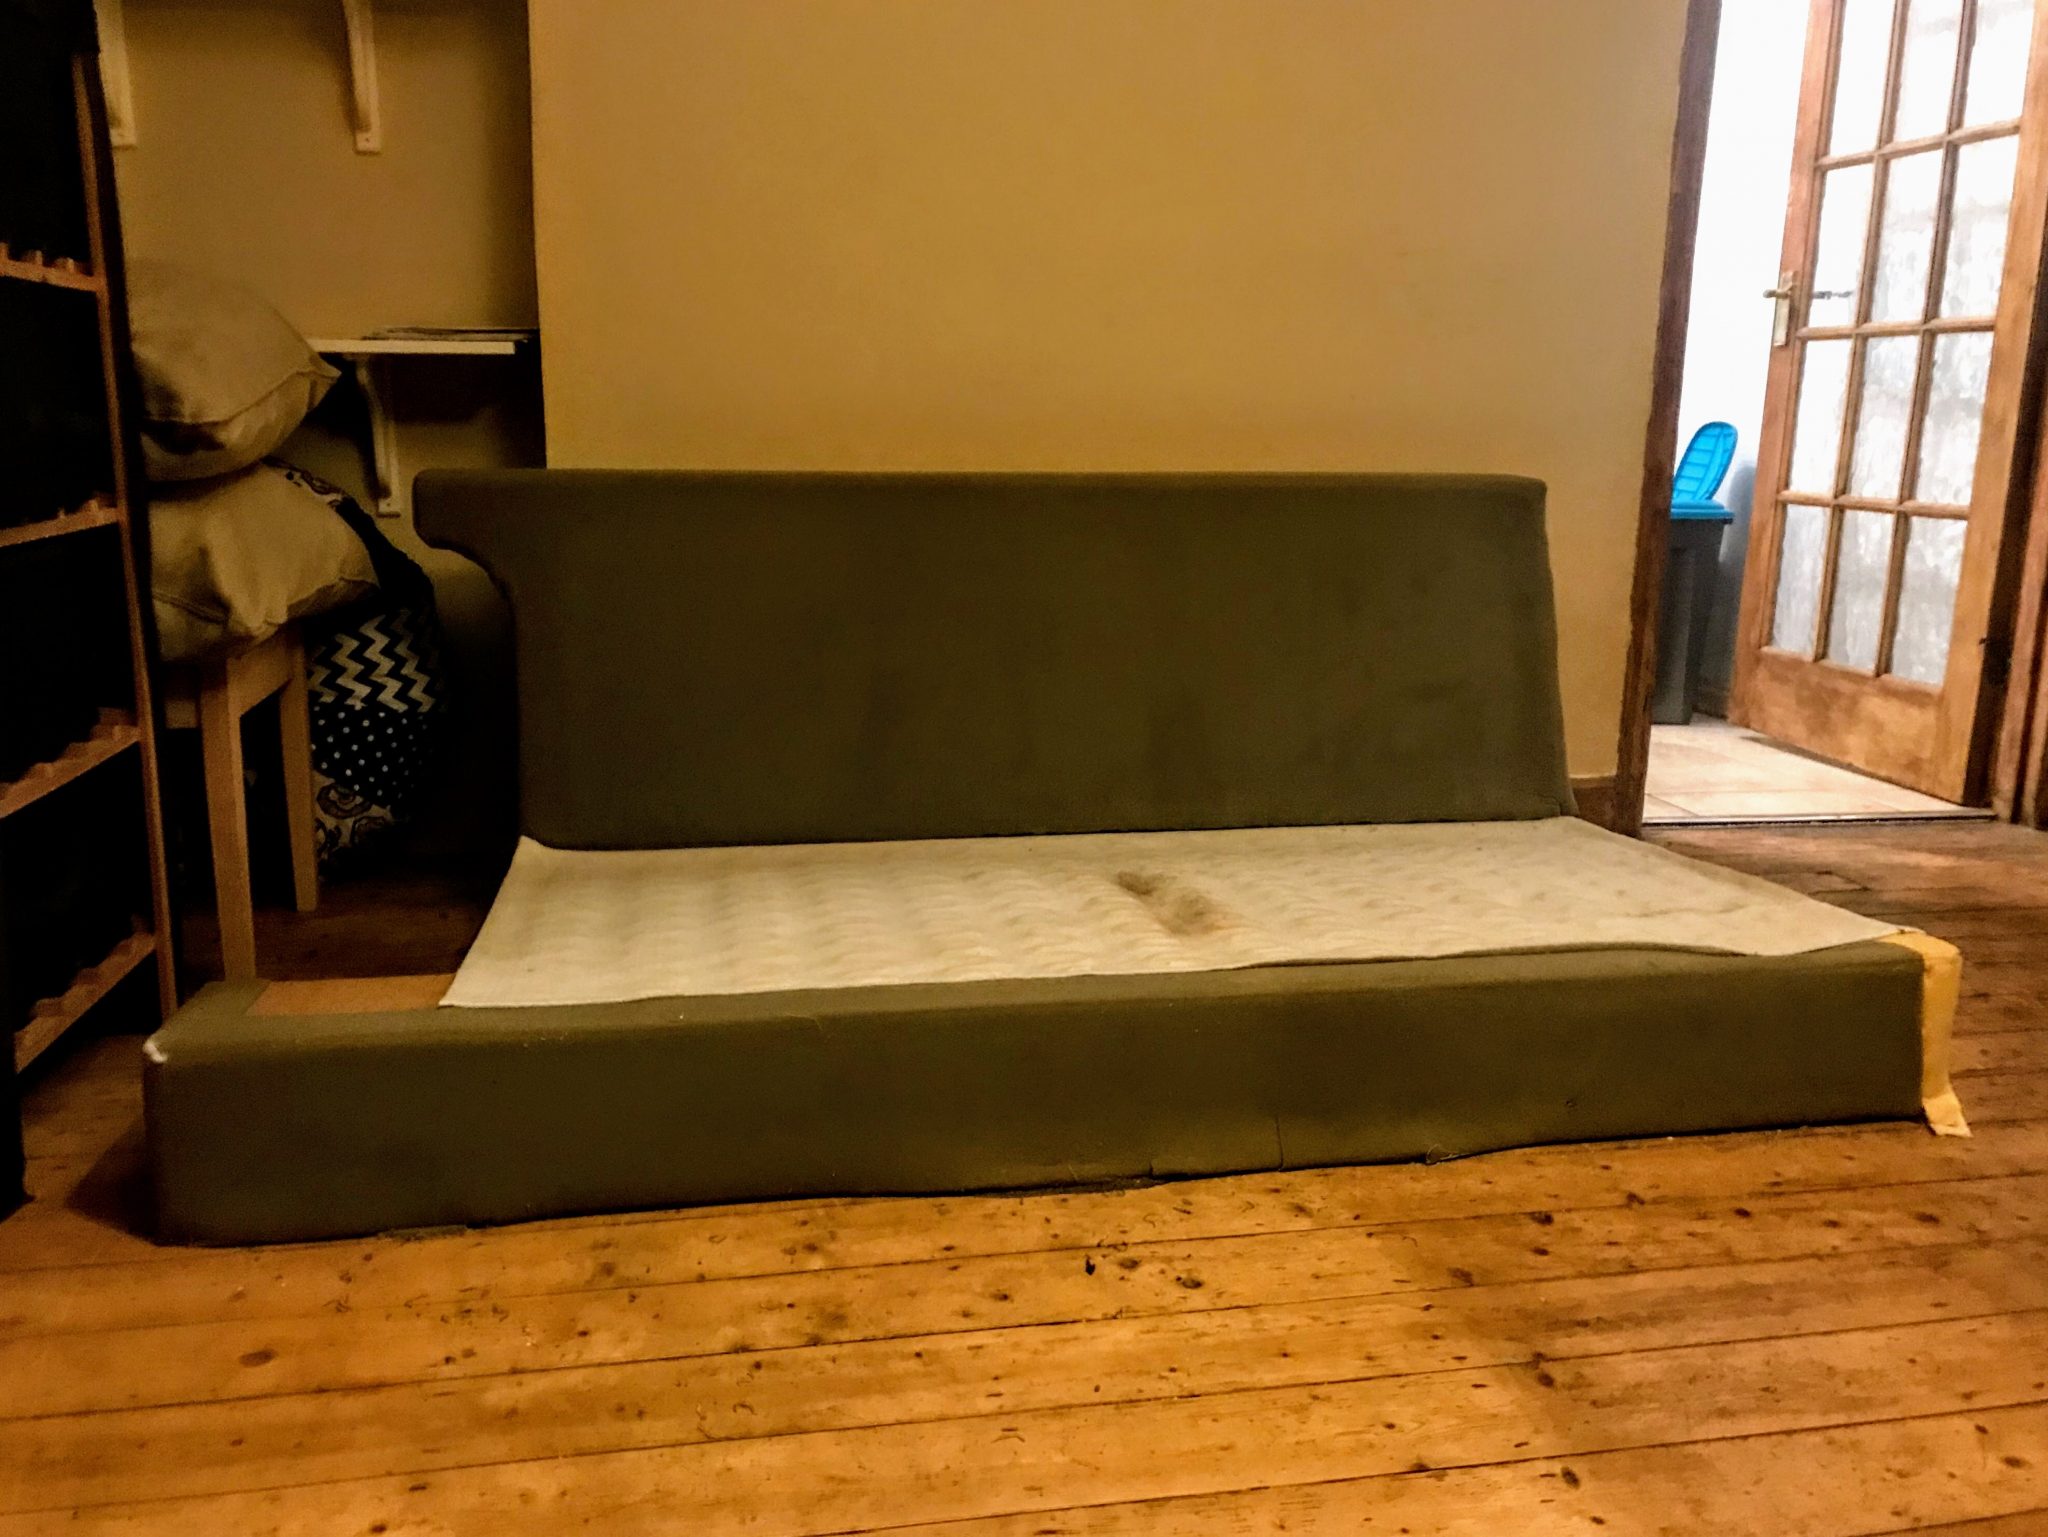
11. Apply foam covering to your sofa or cushions if any of it needs to be replaced. Wash and clean any inners that can be salvaged.
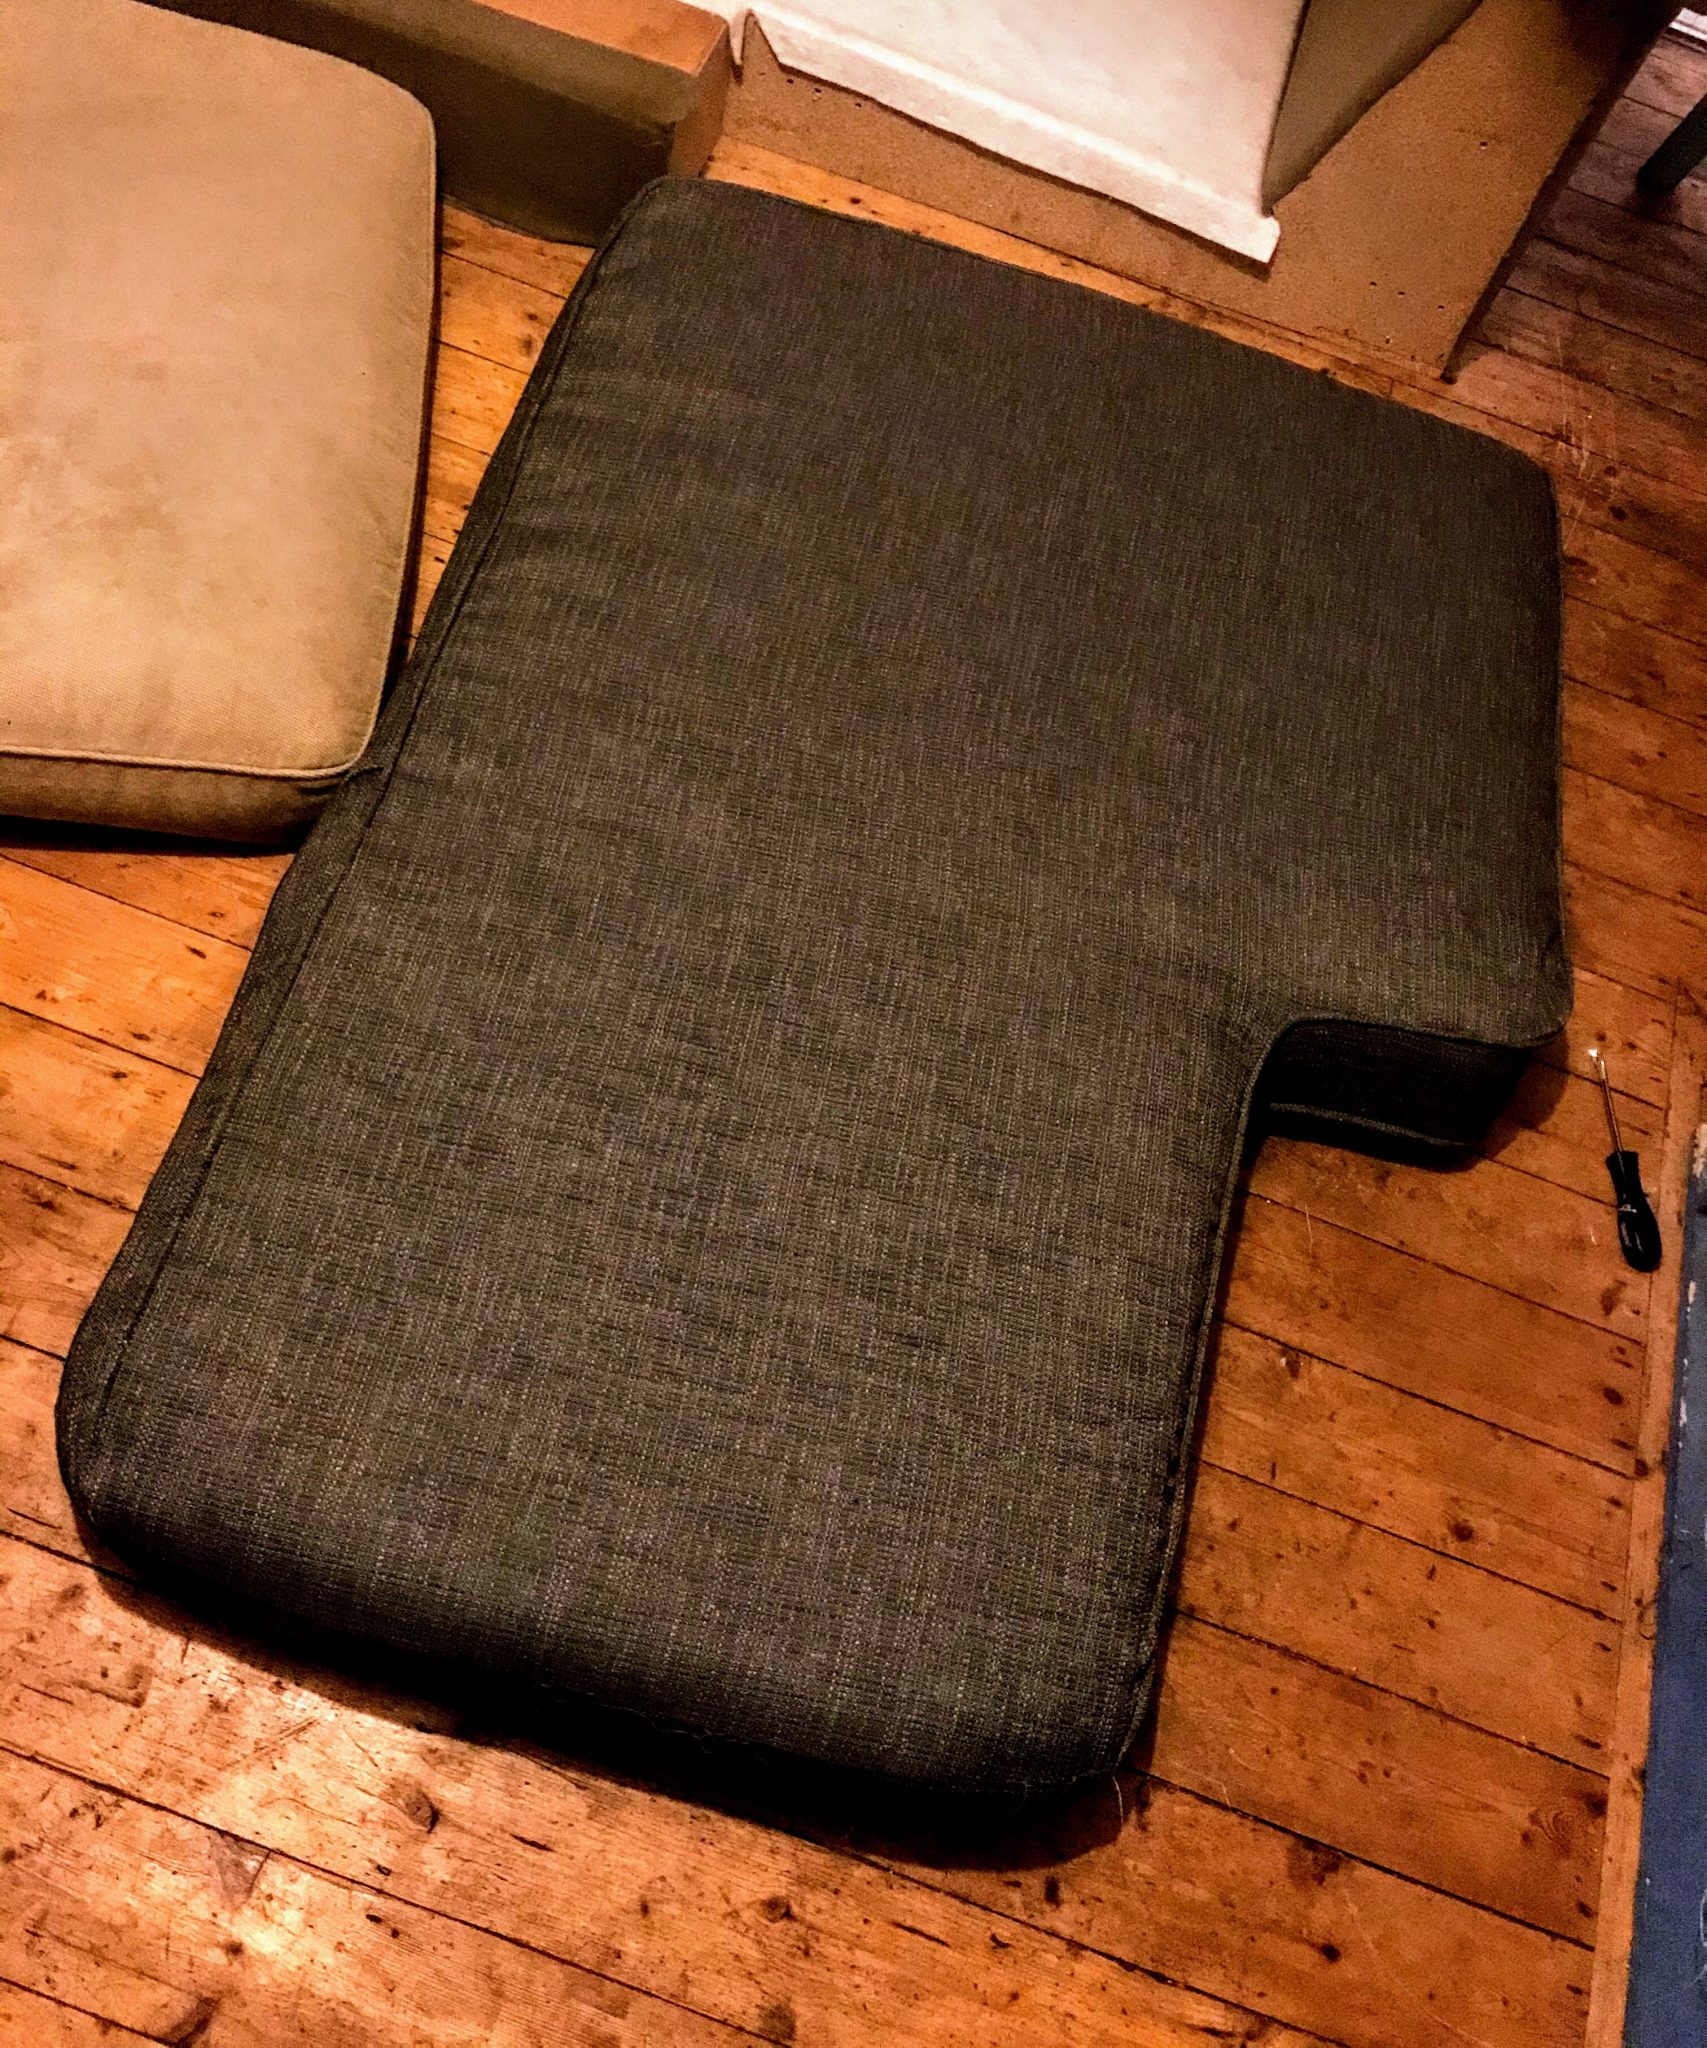
12. Zip your cushion covers back on to check that they fit. Snip off any thread ends. Make adjustments if necessary.
13. Clean your sofa frame.
14. Lay your pieces onto your sofa frame to see if they fit.
15. Tack your pieces into place – make sure they are stretched tightly around the frame.
16. When you’re happy staple them into place in the same way that they were before you took them off.
Make sure that the piping on the arms is in place if you have it.
17. Reassemble your sofa by screwing the arms back on.
18. Make sure all of your fabric is caught inside the frame and you can’t see any joins or staples. Cover the bottom with black fabric if you’re happy.
19. Put sofa together and replace the cushions.
20. Take a seat.
Remember to protect your new cover with a throw to make sure your hard work doesn’t get ruined!
I hope you enjoyed this beginner’s guide to upholstery and that it’s inspired you to do your own!
Share your upholstery stories or questions with me in the comments or on social media.
Related:
- How to make a really simple quilt
- How to paint laminate cabinets
- How to create your families dream home
Pin this for later:


Wow, that transformation is amazing, it looks like a totally new sofa!
I’ve just popped an order in for some of these tools as our sofa is a mess with the dogs 🙁
This is now our project for our week off in August. Thank you. It looks amazing
Aw great article! Bonus points for the cat picture at the end looks so cute and chilled! ?
This is such a great idea, I would never think of doing it myself and the after picture looks brilliant!
Wow this is impressive. I’d be rubbish at it!
How clever! I would never think to reupholster my own sofa but these steps look like I could give it a try. Thanks!
This is so useful for me. Our dog ruined our sofa bed, literally ripped the fabric and chewed up the foam. I am ordering a staple gun but can’t quite afford the fabric yet. I wanted to use a teal velvet. I was also going to get some dacron to pad it out a bit more. Thanks for all of the tips.
wow this is just so clever, I wish I was more crafty.
Wow I can’t believe that’s the same sofa! You did such an amazing job, it looks so good! xo
Wow this sofa looks amazing
You are too clever! I don’t think I would have the skill or patience to tackle anything like this. My parents are always doing lots of DIY bit but I just don’t know where to start haha.
This is incredibly helpful – our sofa has seen better days so we were thinking about reupholstering it but didn’t know where to start!
That is so useful to know! I guess sofas can easily be wrecked by tenants, children or pets. Some great advice here.
What an amazing transformation – and what skills you have! This must have saved a fortune! I’m always in awe of people fixing and mending things instead of buying new.
Gosh this is so impressive! Well done you x